Notes to self
Proposed outline (new as of 2019-09-02)
- examples with pictures
- theoretical stuff
- frames vs blocks stuff
- link to truck box guy
- multiples of 3
- inset electrical connectors
- frames vs blocks stuff
Where to find pictures
- Sara working outside using the long OSB boxes to make gridbeam
- Pictures of boxes and light blocks, 2019-09-03
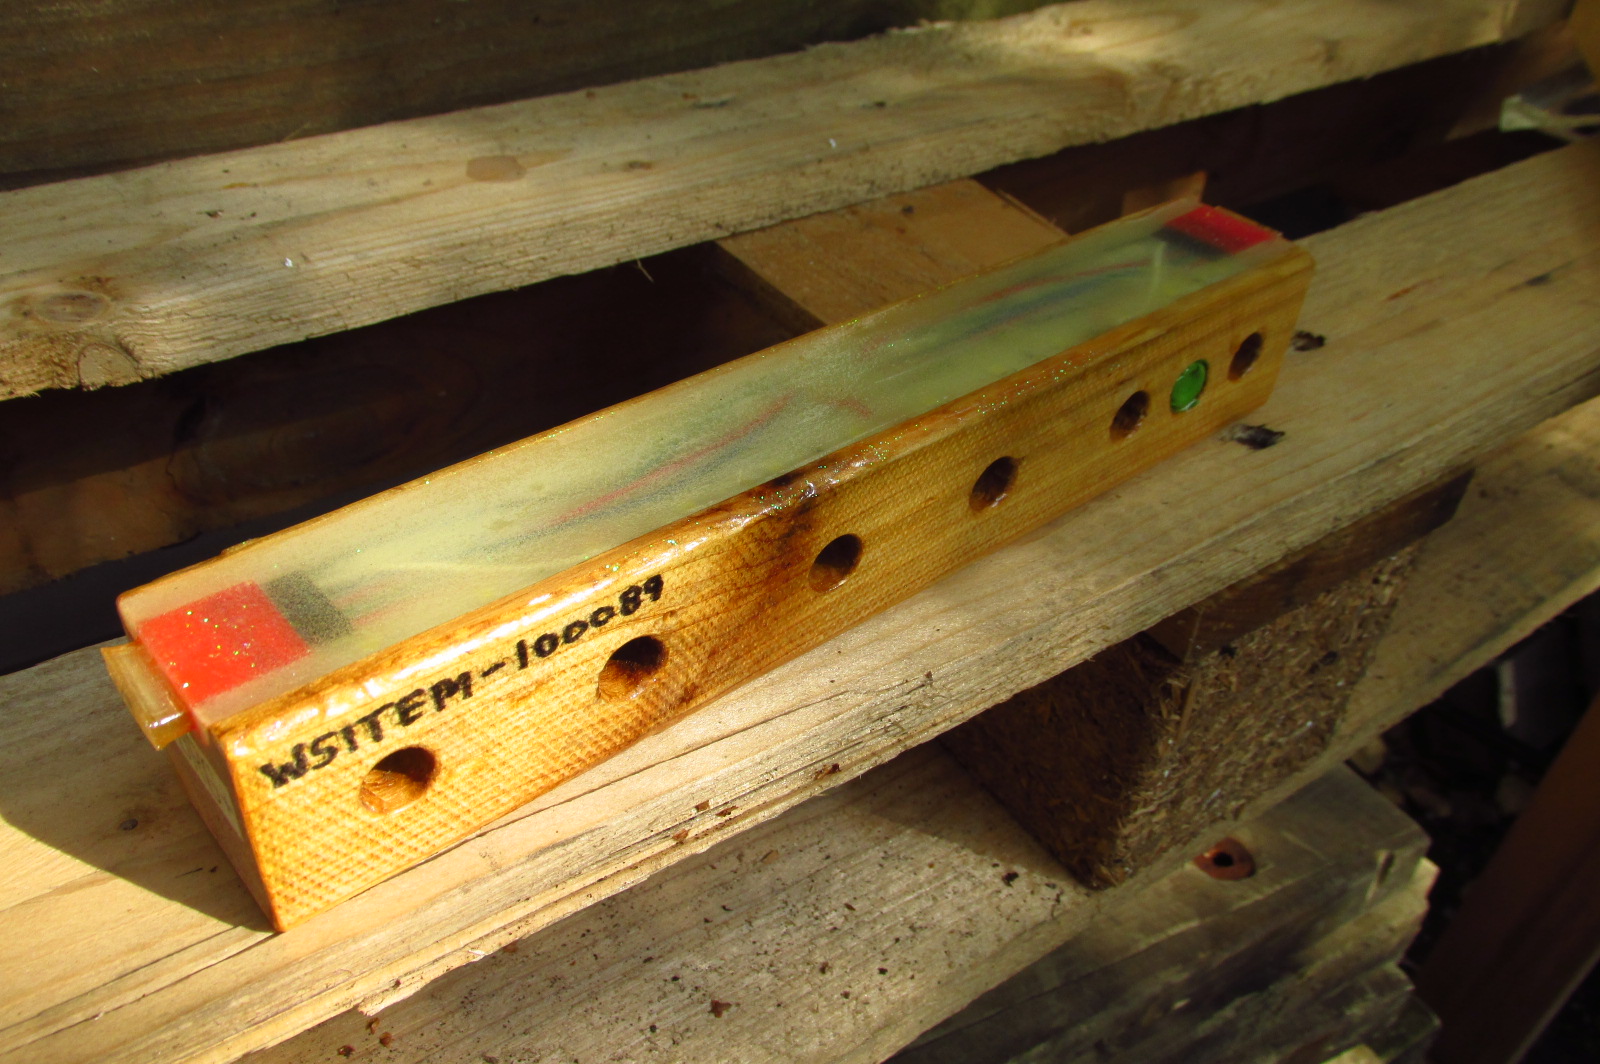
- My 18" box with the 12" router holder on it (from 2019-02-10)
- On 2019-02-25 I made a structure and sat under it.
- Making some early epoxy two-by-two lamps: 2018-11-28 and 2018-11-29
Grid beam is a system of beams in which the width of each beam is equal to the hole spacing.
At some point since my previous project log post I swallowed the gridbeam pill and now everything I make has to be gridbeam-compatible. For boxy things this means dimensions are a multiple of 1½″ (multiples of 4½″ and/or 12″, are desireable for reasons I'll get into shortly, with 18″ being especially handy). For equipment that isn't itself gridbeam but that is to be mounted on gridbeam structures, this means mounting holes accept ¼″ bolts and are in standard positions.
I've accumulated a lot of opinions about bolt holes and box sizes.
But first, pictures.
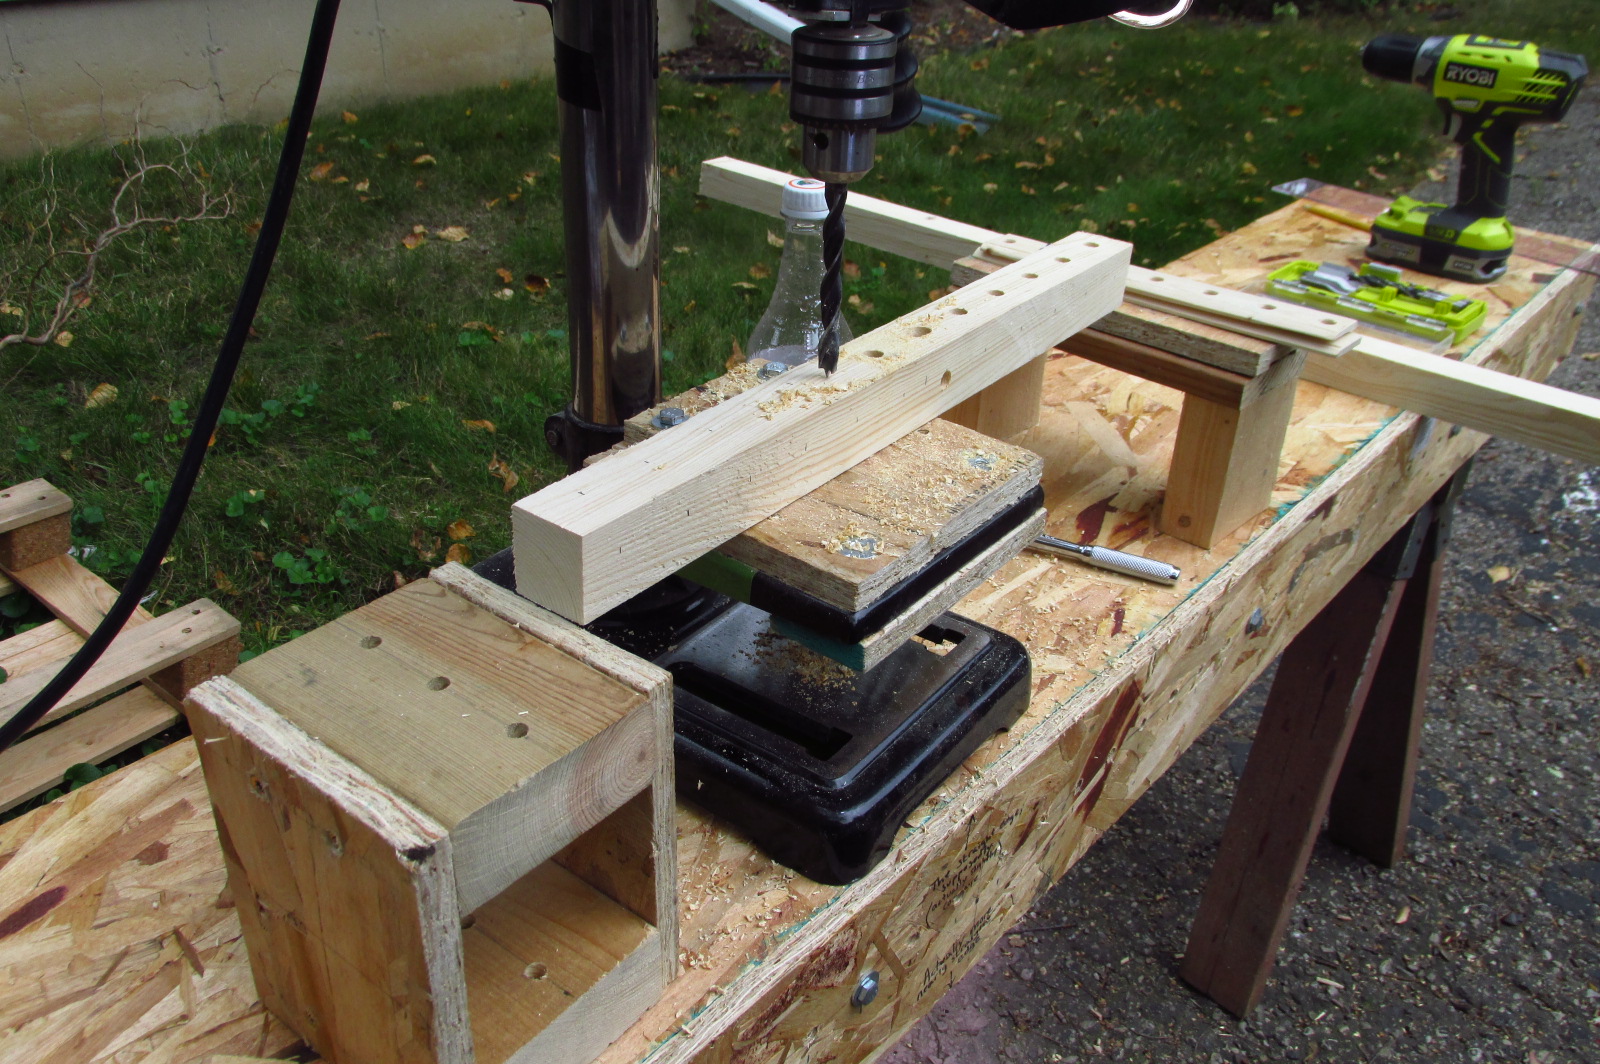
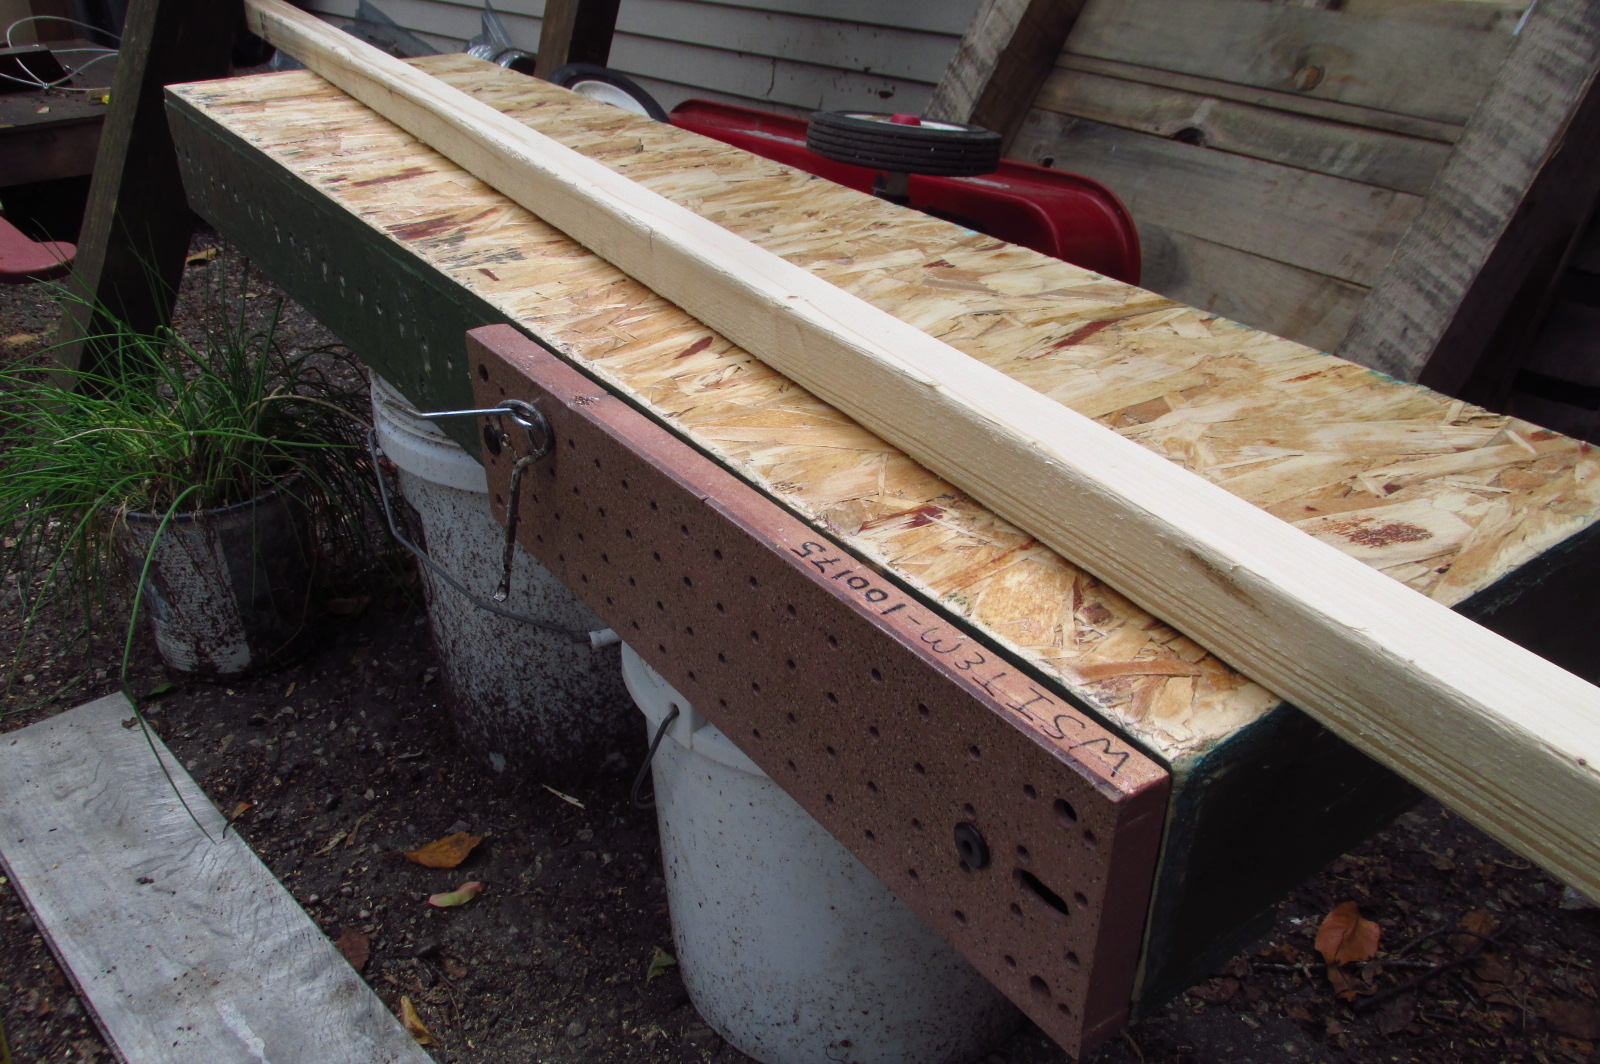
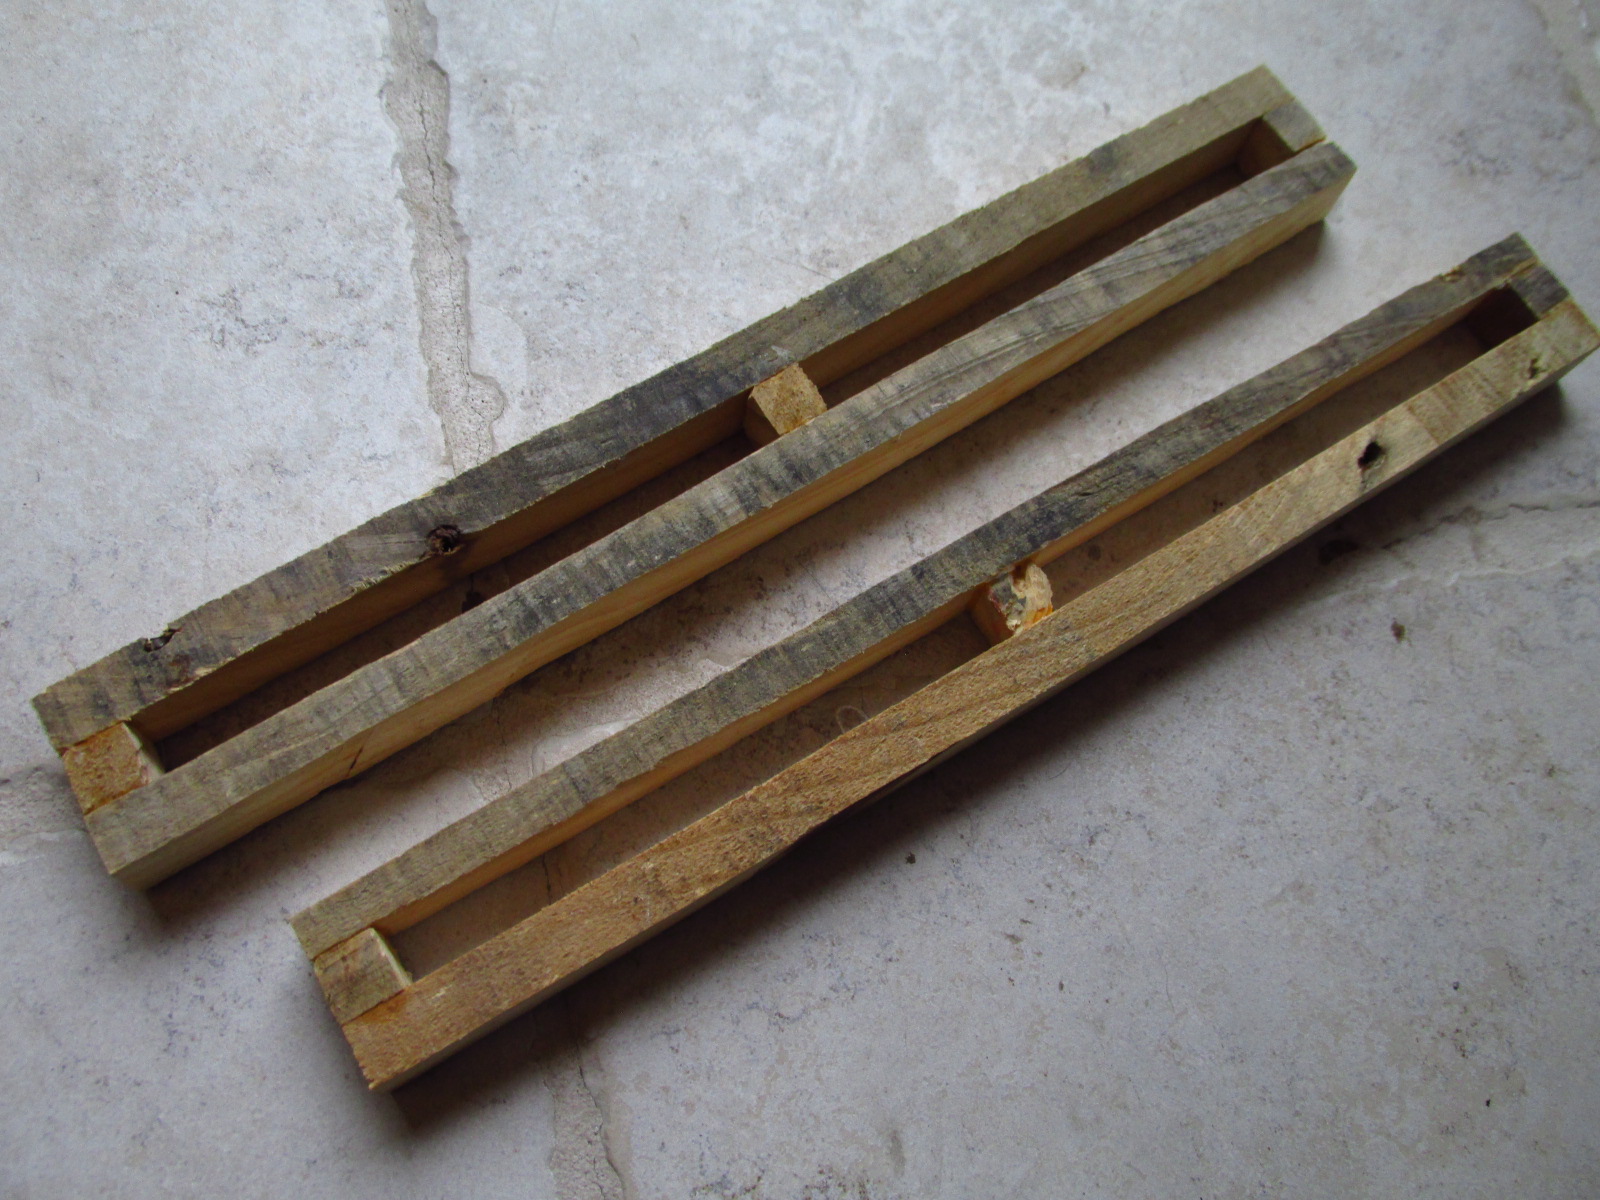 12″ pieces of 'slotted gridrail', made by gluing together ½″ strips of pallet wood.
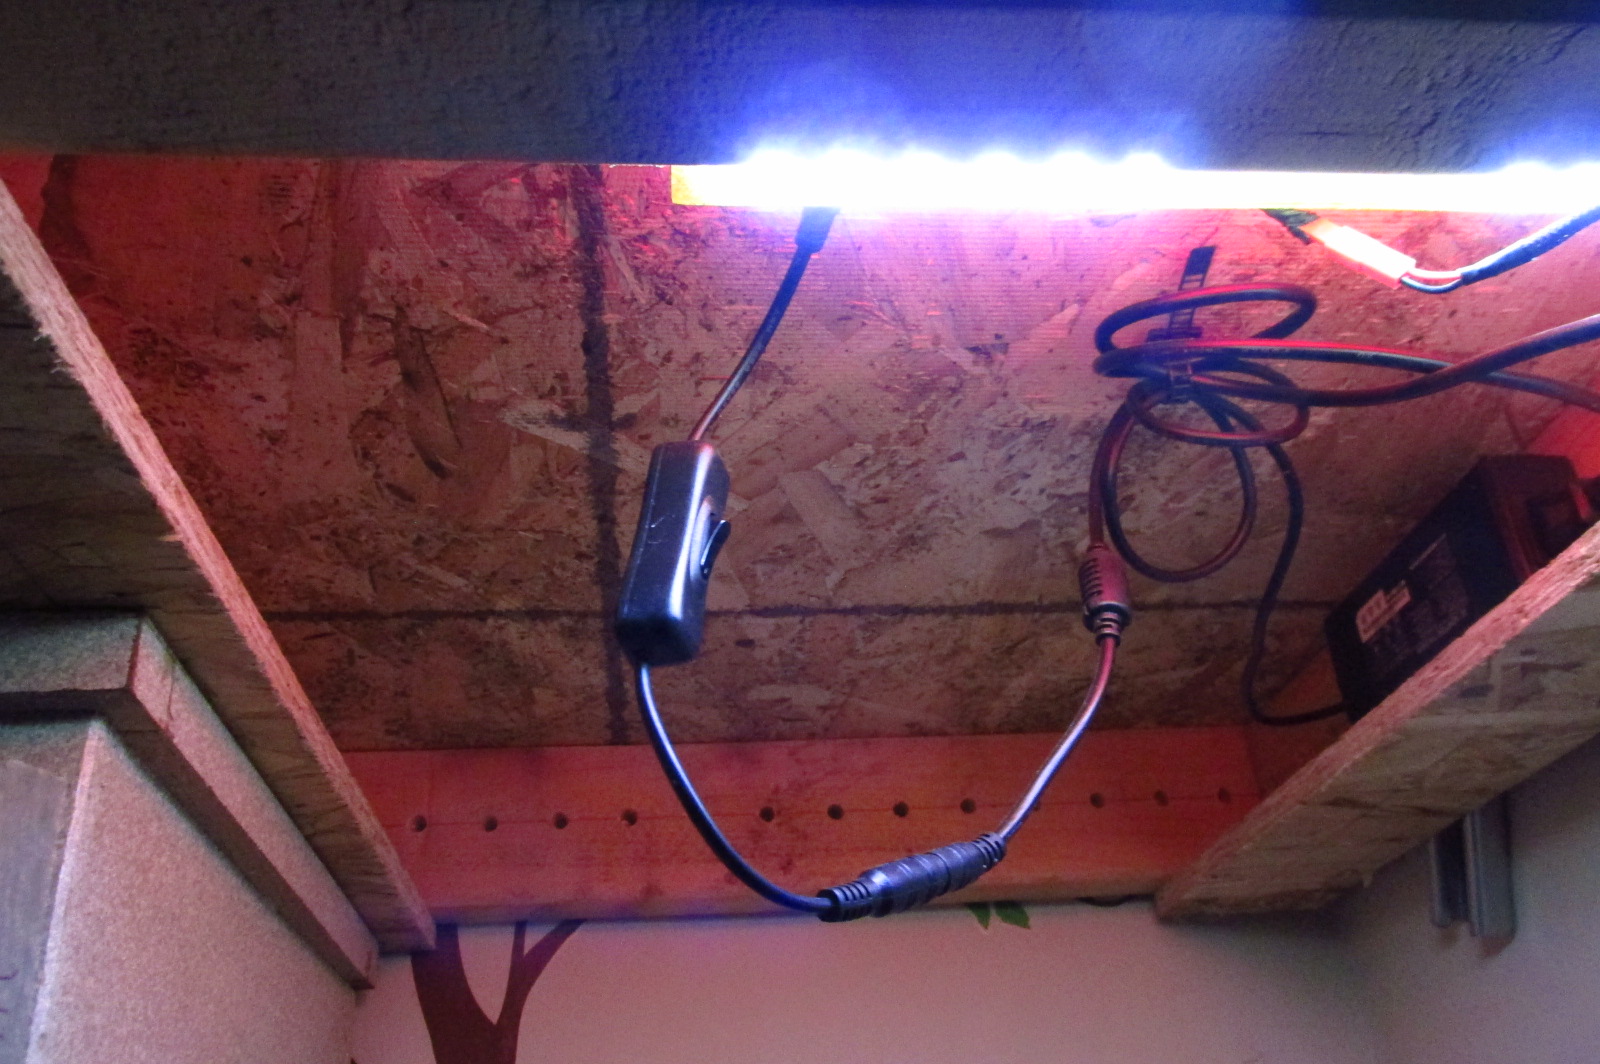
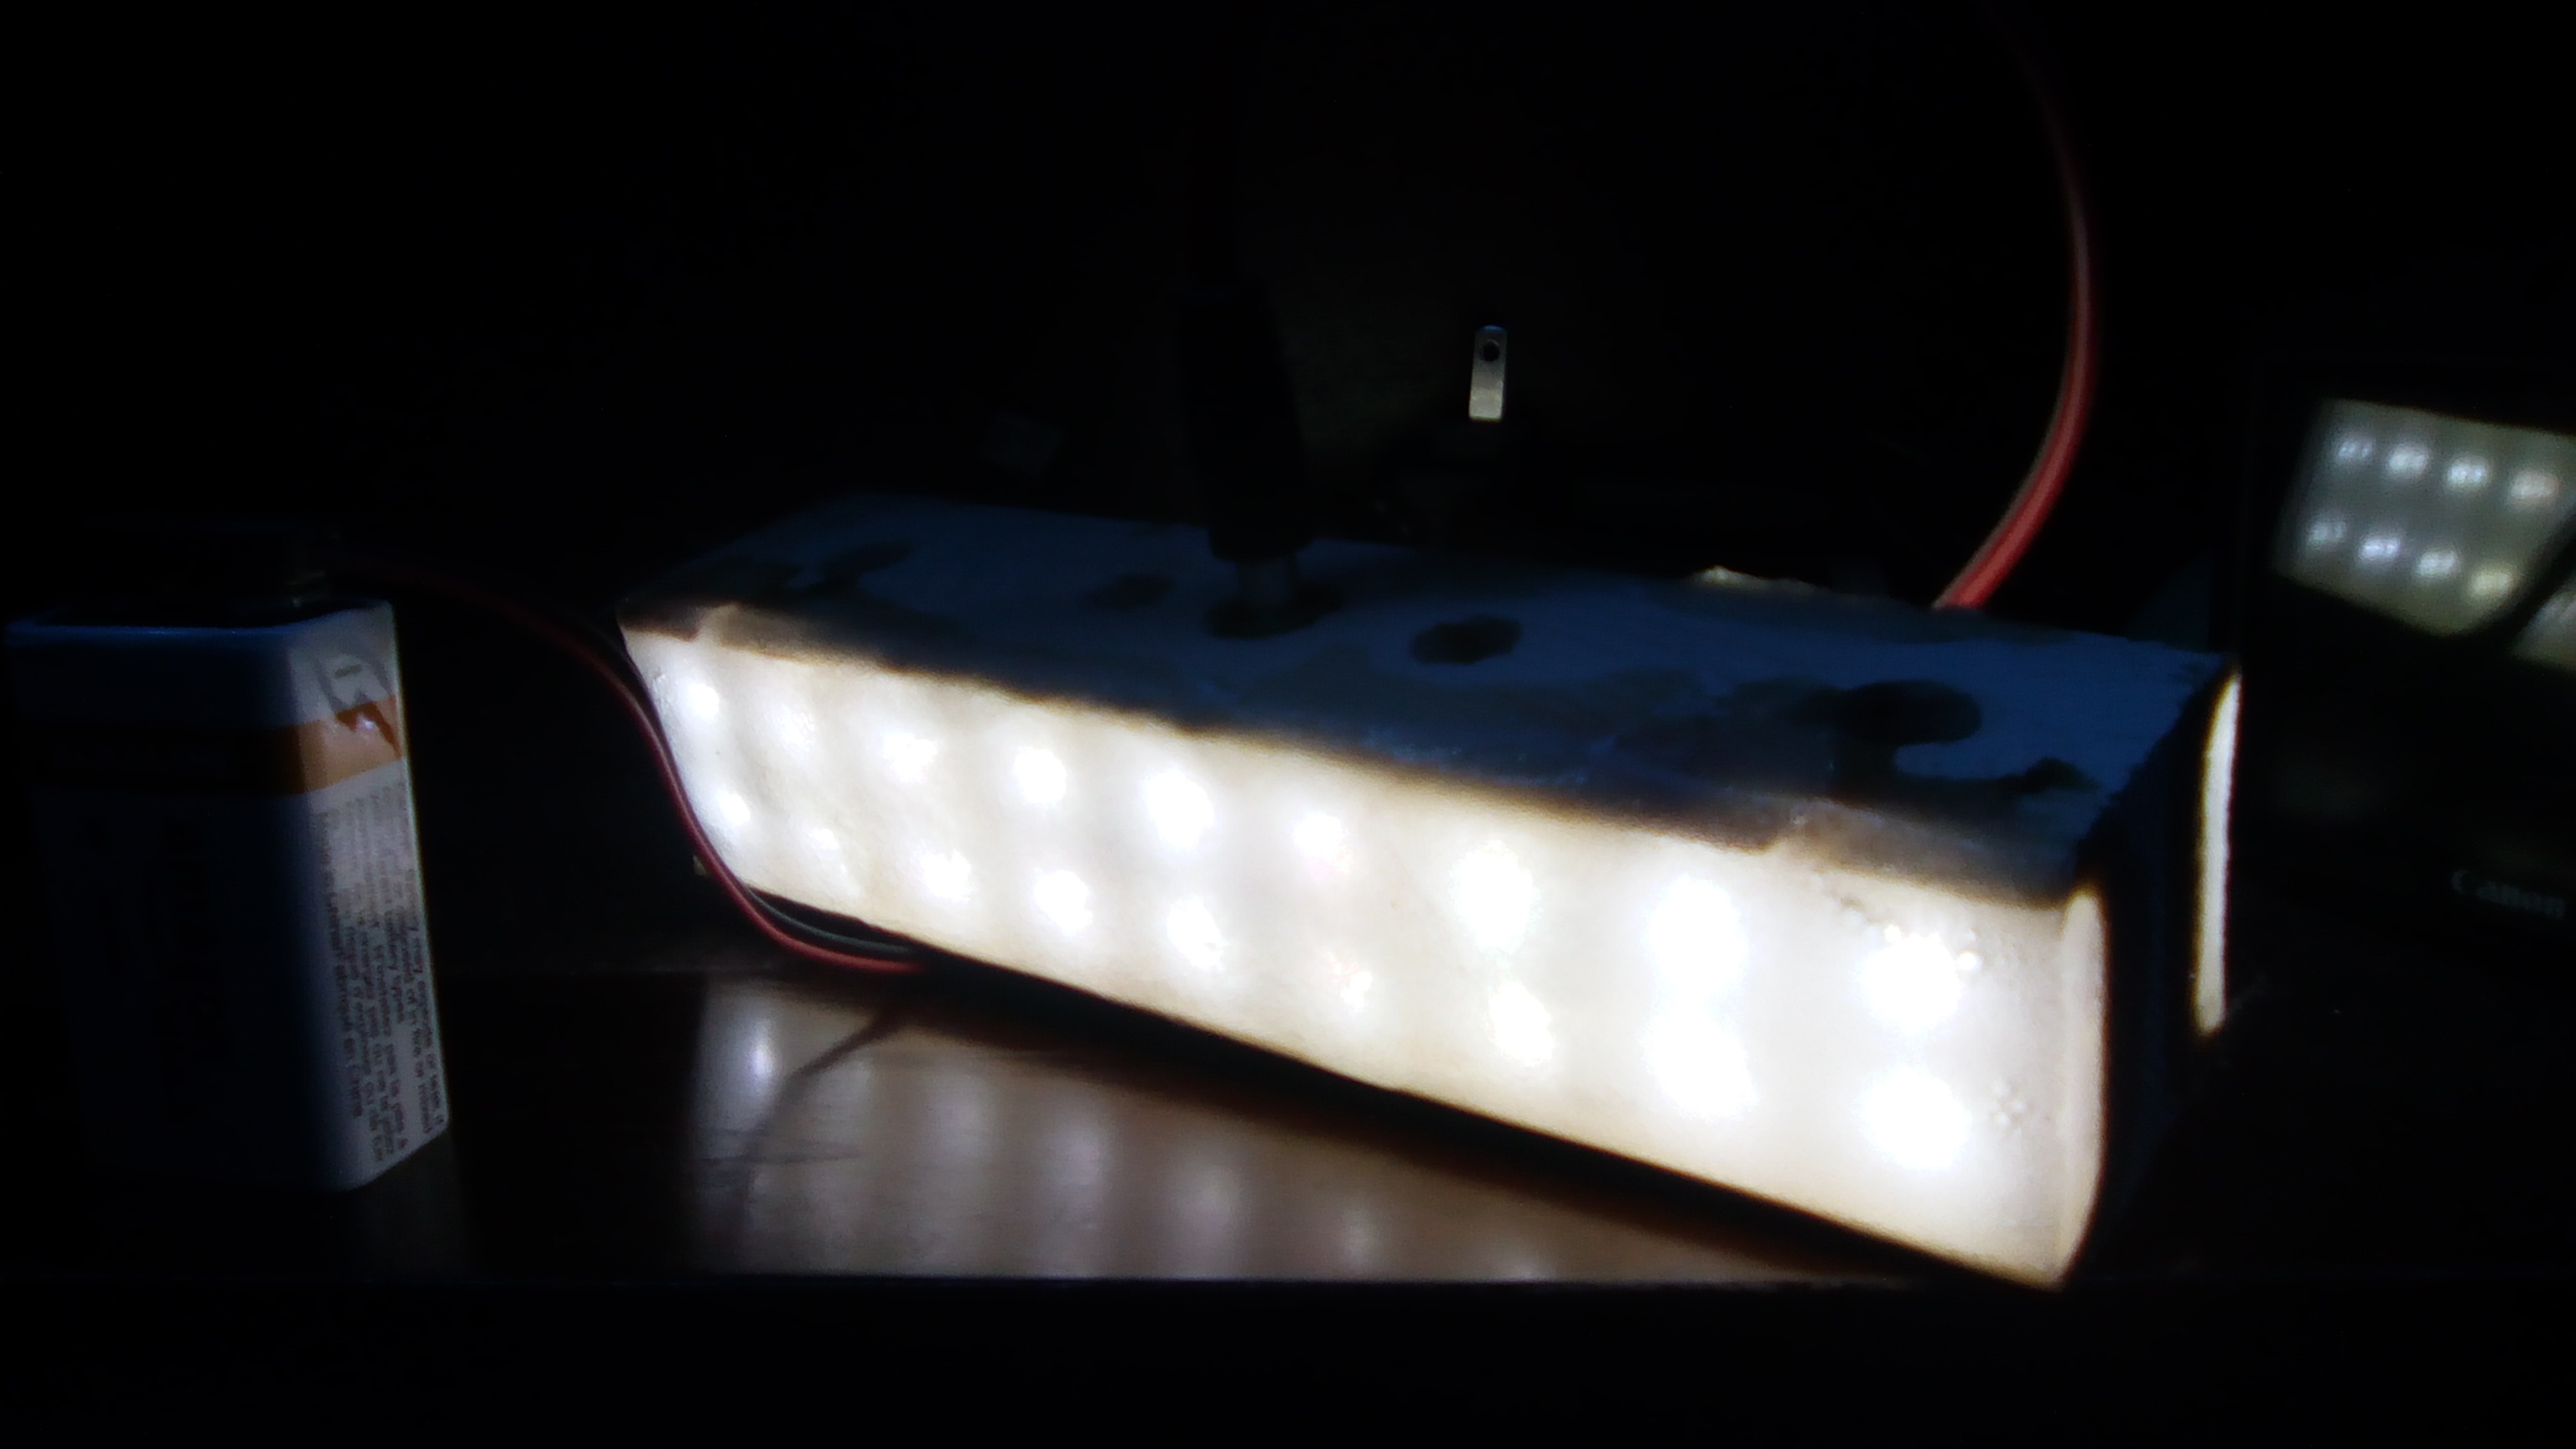
Maybe talk about these LED blocks in a different entry because they'd benefit from some animations or interactive buttons or something.
+,G,R,B,W,-,
where G,R,B,W can be connected to - to turn on the lights.
Since + and - have dedicated pins,
the lights can be controlled independently of whether the whole unit as a whole is powered.
The idea is that you could power the unit using the barrel connector,
but then hook up any RGBW LED controller you want,
which draws its own power and controls the lights from a single 6-pin connector.Regarding spelling of nominal lumber dimensions
I'm trying to follow a convention I picked up, I think from the gridbeam guys, of referring to nominal lumber sizes by spelling out "two-by-two" or "two-by-four", wheras actual [approximate] sizes are referred to with digits, e.g. "A 13½″ cube may be constructed out of two-by-twos".
TOGRack
Before I discovered gridbeam, I had wanted a way to build modular electronic thingamabobs, and so I invented a couple of personal standards for small (3½″) wooden panels on a rack:
- TOGRack: Rails for 3½″ panels, with centers 3″ apart, and holes for #6 screws every 1″ or ½″
- Macro-TOGRack: Holes for 3⁄8″-16 bolts on a 16″ grid (designed to match common household stud spacing)
While TOGRack works well for its purpose (it's basically a smaller, rounder-numbers version of Eurorack), the utility of macro-TOGRack (which provides a 'widely spaced regular grid of attachment points') is a little less clear. The 16″ grid was chosen because that's the normal distance between studs and floor joists, but since a panel takes up one attachment point, you can only have panels spanning every other space. This works fine if you are just using the mounting holes to attach unistrut, or build panels that are just under 16″ wide and put bolts at the edges or corners (maybe using some big old square washers to hold the panel down), but most panels don't work like that. They have mounting holes inset from the corners that they expect you to put screws through. 19″ racks provide a standard for this kind of thing, but the dimensions are a little bit weird and overly-specialized (for some reason the side-to-side dimensions are specified in millimeters while the vertical dimensions are specified in inches, and the hole spacing is pretty wacky). What I really want is a unifying scheme for everything I build.
Frames and Blocks
This got me theorizing about the difference between what I call 'frame-based' and 'block-based' building systems. In frame-based systems you have a dichotomy between the framing and the stuff between the frames, whereas in a block-based system, everything's a block, and blocks stack. Some examples of frame-based systems:
- Tinker toys
- Most of the structures I build in Minecraft (I like to use a system where every third block is a framing block, and the spaces between them are walkways)
- A bookshelf (books sit between the shelves, and the shelves also take up space)
A characteristic of these systems being that the primary building blocks of these system don't fill a whole 'unit' of space, since there needs to be room for the frame at the edges. Or thought of another way, the connectors between pieces add their own thickness. This causes some trouble when you want to have content that spans multiple cells, because its can't just be a multiple of the single content width. It has to also include the width of the frame parts that its skipping over. If I put two of my 2-wide Minecraft hallways together, the resulting hallway is 5 blocks wide, not 4.
The trouble I have with frame-based systems is that they make it difficult to mix components at different scales. Say you want to create a 4×4-unit panel. The width and height are going to be 4 times the width of a 1-unit panel, plus 3 times the width of the framing. Which is a little bit yucky in itself, but the real problem is structural: this panel is probably going to be somewhat massive, so that the framing intended for 1-unit panels might be insufficient. So now you need to come up with yet another class of part that's neither frame nor panel to support these larger things.
In contrast, in a block-based building system, the content itself is the structure. Lego bricks are a pretty good example (they can even be combined at different scales to some extent), as are the blocks in Minecraft (which I sometimes wish I could subdivide further).
Most structures in real life aren't strictly one or the other. In a brick wall the bricks themselves are carrying the load of everything above them, so in that sense are block-like, but have to be sized taking into account the mortar between the bricks, and are in that way frame-like. You might call this structurally blocklike but dimensionally framelike.

Walls in Satisfactory might deserve a mention, if only because I've been playing Satisfactory lately and they're on my mind. In Satisfactory you can place big blocks called "foundations", which are standard dimensions (the large ones are 8×4×4 meters). Building with those is similar to building with blocks in Minecraft. But Satisfactory also gives you walls, which snap to the edges of foundations. I'd be tempted to say that this makes Satisfactory structures framelike, except that as far as foundations and other walls go, walls do not take up their thickness, making Satisfactory's foundation+wall system truly blocklike, but with optional zero-width borders between cells.
From this perspective, both TOGRack and macro-TOGRack both appear to be framelike systems, since their primary use is to attach panels to rails, or to attach rails to walls. There's no obvious single fundamental building block in either system. And maybe framing things that way helps explain why I found those standards less useful than I hoped they would be.
Gridbeam
I came across gridbeam while wasting time on Hacker News one day. It seemed like these guys were trying to solve the same problem I was, so I watched some videos, bought the book, and decided to buy into this sytem.
Unlike my panel standards, gridbeam is intended to be used in 3 dimensions. To some extent this helped me resolve the conflict between frame-based and block-based building systems in my mind, as the frames (structures made by bolting together two-by-twos) have dimensions that are a multiple of the unit block size (1.5″). They'll tell you that this is very important because it's what makes tri-joints work. I don't even use tri-joints that much (I'll often construct things using gridbeam-compatible panels instead of actual grid beams); I'm just happy that I don't need to think about 'framelike building systems' anymore (they are still useful, but being themselves based on gridbeam seems to make the remaining variables not matter as much).
Gridblock
'Gridblock' is what I call blocks thicker than a single two-by-two that are designed to compose (by stacking and/or bolting together) with gridbeam stuff.
The way that panels are conventionally attached to gridbeam structures is that you have a gridbeam structure, and then you attach panels to the sides. That's fine, but it didn't sit quite right with me that after adding a panel, the overall structure is no longer a nice, symmetrical, even-sized block! And gridbeam is not really suitable for smaller boxes anyway, as the two-by-two framing is totally overkill and wastes a lot of space.
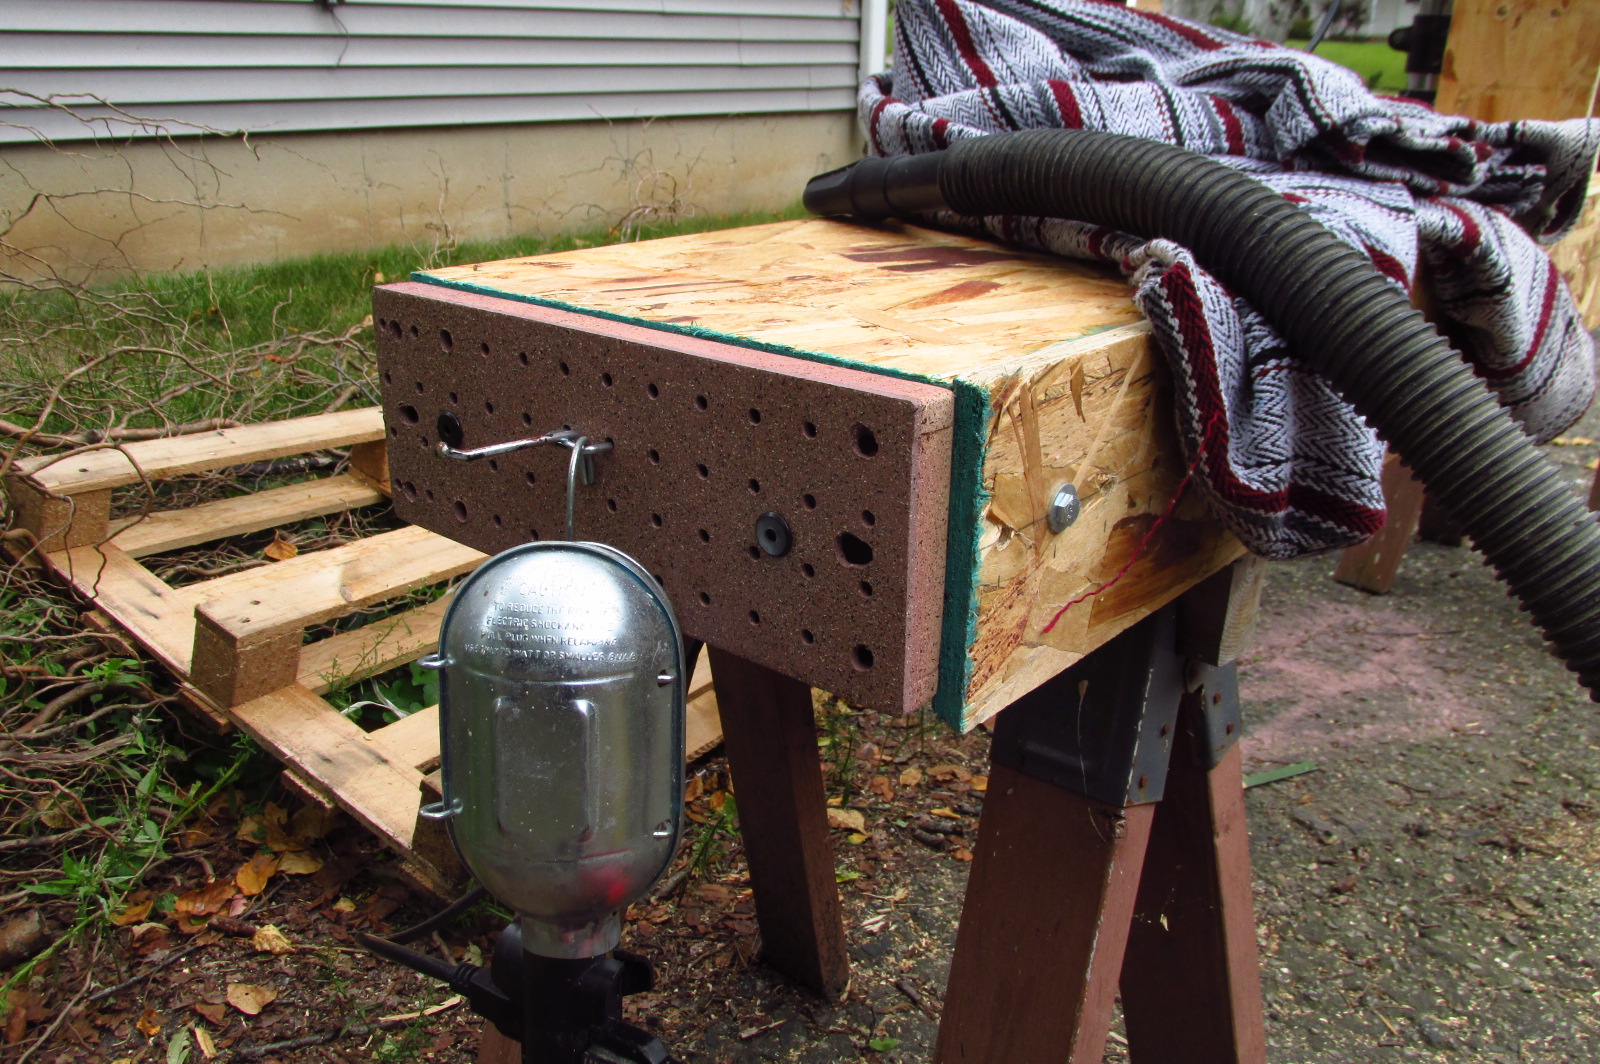
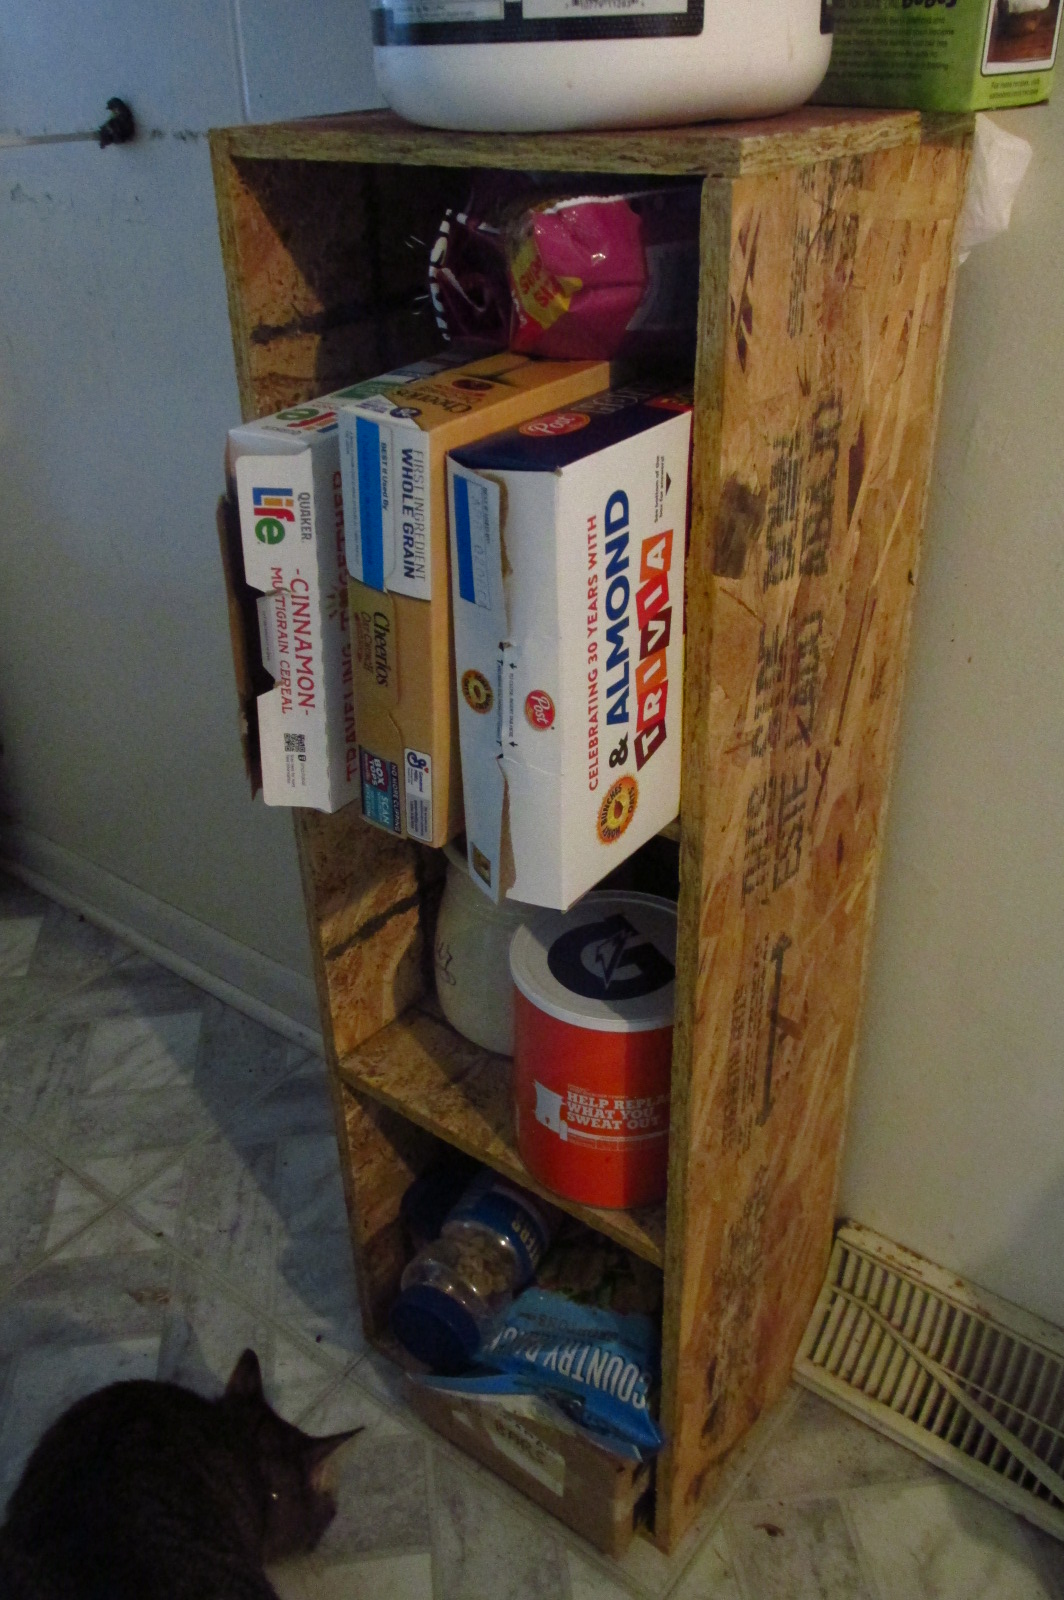
My solution is to build what I call 'gridblock boxes'. Their external dimensions are nice gridbeam-compatible sizes (4½″, 6″, 12″, 18″, and so on) and bolt holes are placed following the gridbeam convention so that they can be bolted to each other or to grid beams. Each box is a single, atomic piece, usually held together with wood screws or glue.
However:
- The edgemost holes can't be used because the heads of bolts through them would collide with the connected side.
- When you make a box that's several gridbeam units wide in 3 dimensions, the number of possible gridbeam holes quickly becomes much larger than the number of holes I'm actually willing to drill.
These constraints got me thinking: if I want to only drill some of the holes, which ones should get priority? Since edges are often off-limits, it should be at least the first hole in from the edge. For a 12″ box, this would mean holes 2¼″ from the sides in each corner. Two of these boxes could then be connected by matching up the faces and bolting them together.
Unfortunately, perfectly matching up the faces is the only way that two 12″ gridblock boxes can be connected. Otherwise you need to drill more holes. This is also a problem when trying to connect boxes of different sizes.
I wanted to be able to scale up gridbeam to make blocks that are larger-than-but-still-compatible-with gridbeam without necessarily exploding the number of bolt holes that would have to be drilled. The trouble is that while each gridbeam unit block has a single bolt hole through the center, when scaled up by an even factor (4 or 8 in the case of 6″ or 12″ blocks), the center of the scaled-up blocks aren't valid bolt hole locations, which means that instead of a single, centered bolt hole, you have to (assuming you're going for symmetry) make 4 bolt holes.
But if you scale up by an odd factor, like 3, the resulting blocks still have a single canonical center bolt hole. Scaling up the gridbeam unit by 3 gives us the somewhat odd dimension of 4½″, but that divides well enough into 9 and 18, and also happens to be the thickness you end up with if you attach ½″ boards to the edges of a two-by-four (which are 3½″ wide).
Following the blocks-are-multiples-of-3-of-the-base-unit rule, which gives us 4½-inch 'gridblocks', we can go up to an 18″×18″ box and only have to drill 16 holes to be able to accommodate attaching 4½″ or 9″ boxes in the middle or in any corner.
You could take this further and say that the next size up after 4½″ should be 13½″, not 9″ or 18″. The reason I don't build 13½″ boxes is that 13½ is close enough to 12 to make combining with 12″ things (which I expect to be common) awkward. But I also don't expect to be trying to hold such large blocks together with a single ¼″ bolt (for attaching boxes to walls I use a system of 3⁄8″ bolts on a 8″×6″ grid, which is sort of a gridbeam/macro-TOGRack compromise; see the shelf with KV rails for example).
Gridrack
So back to the rack situation. Speaking of framelike systems built out of blocklike ones...
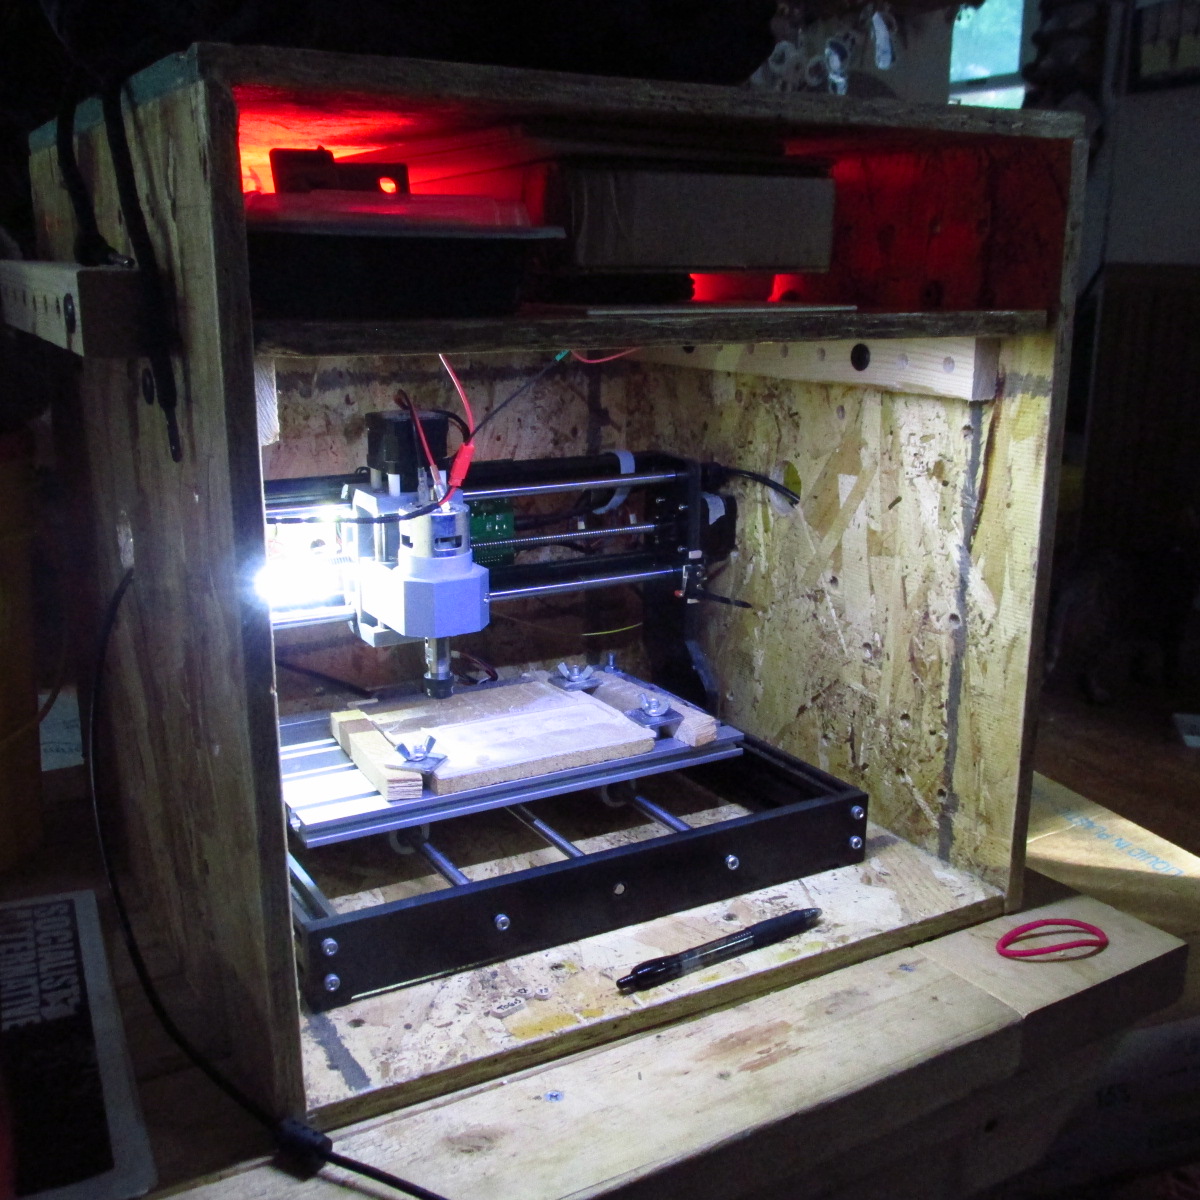
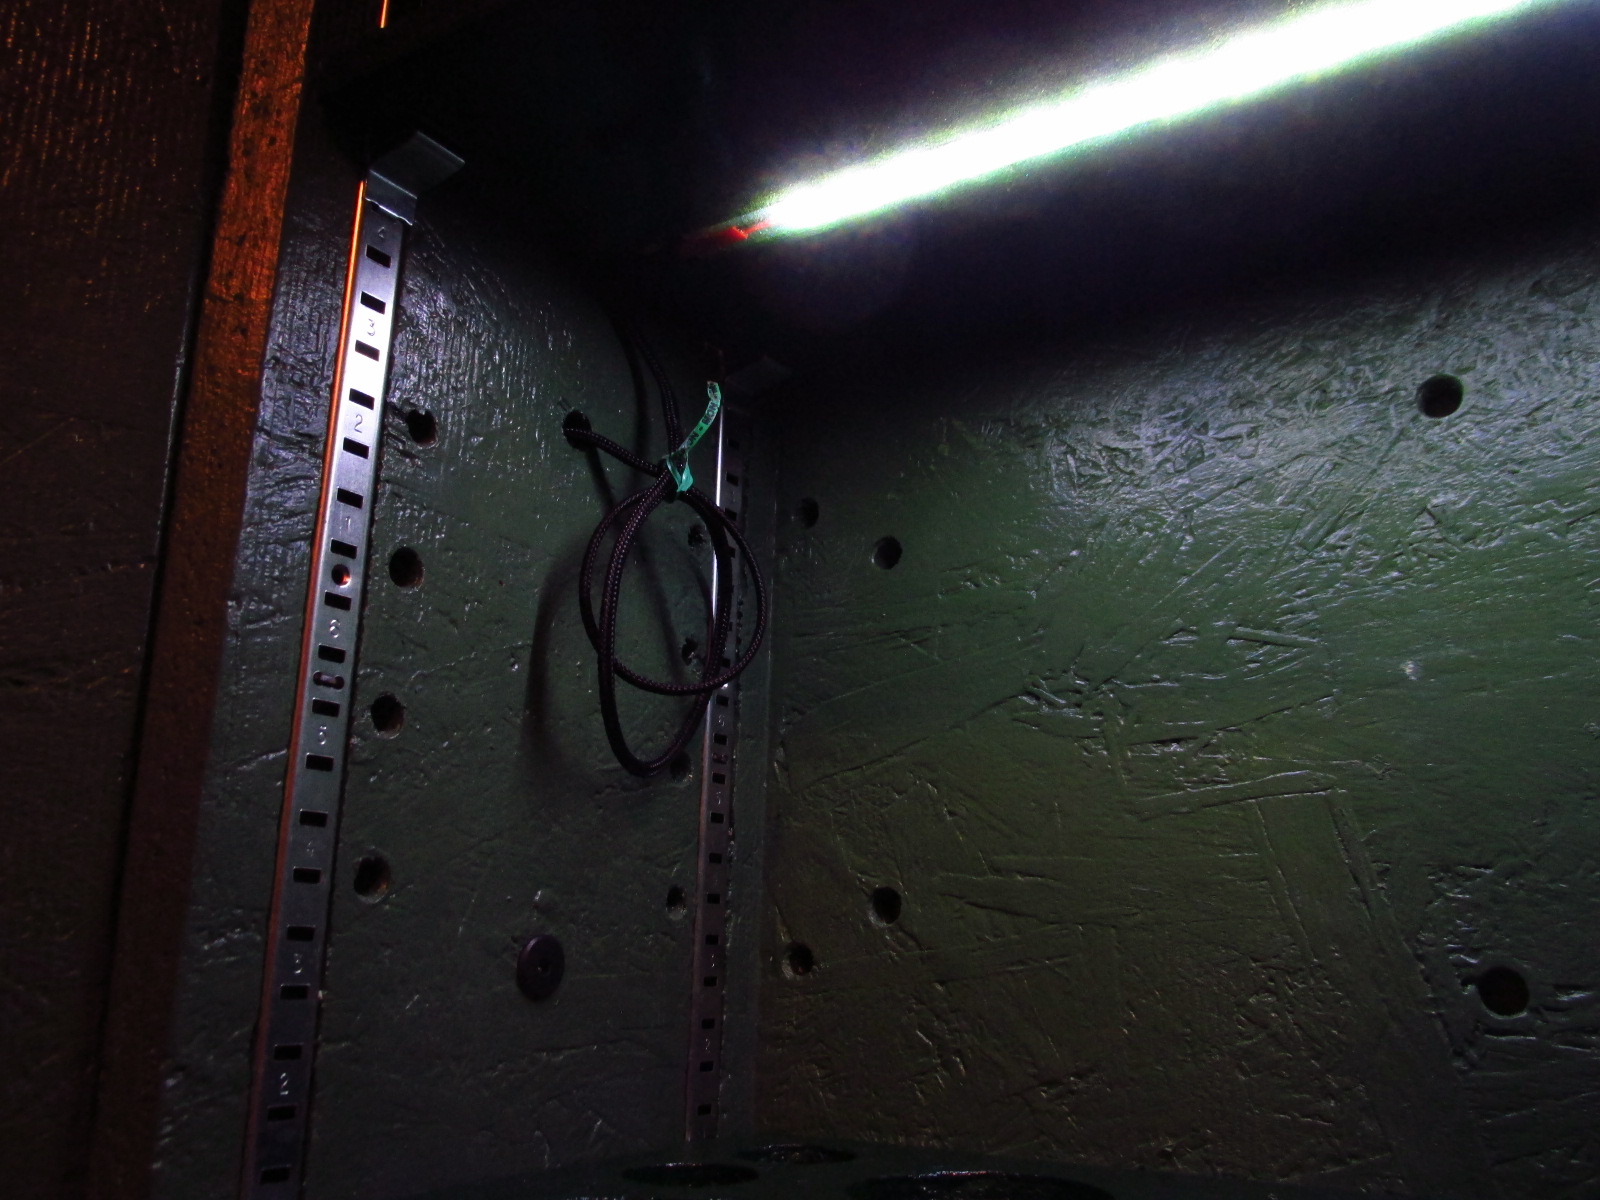
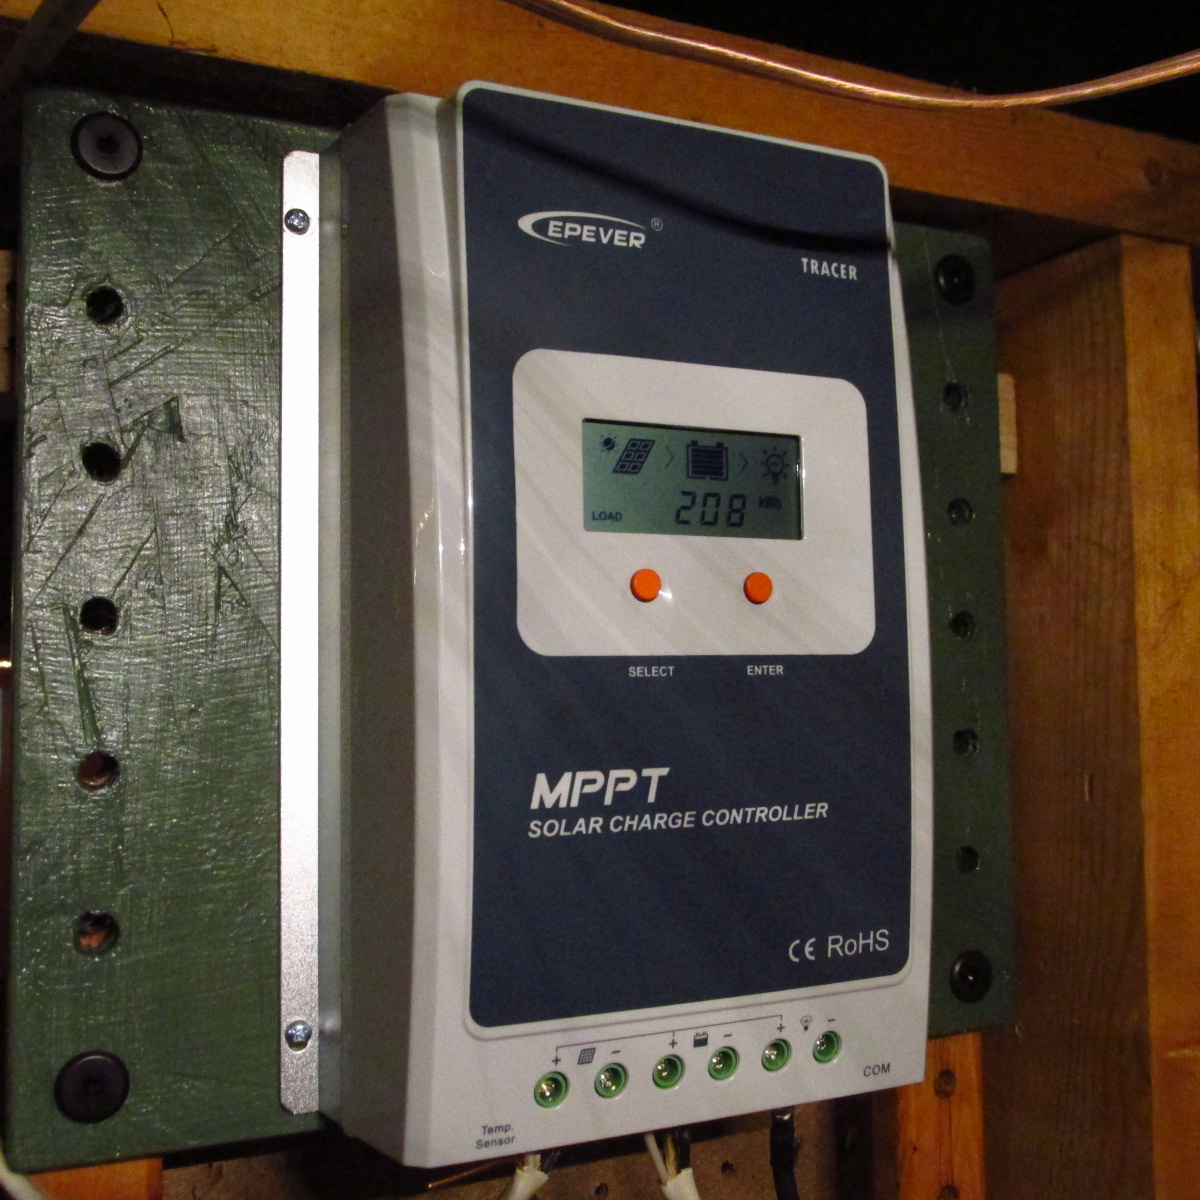
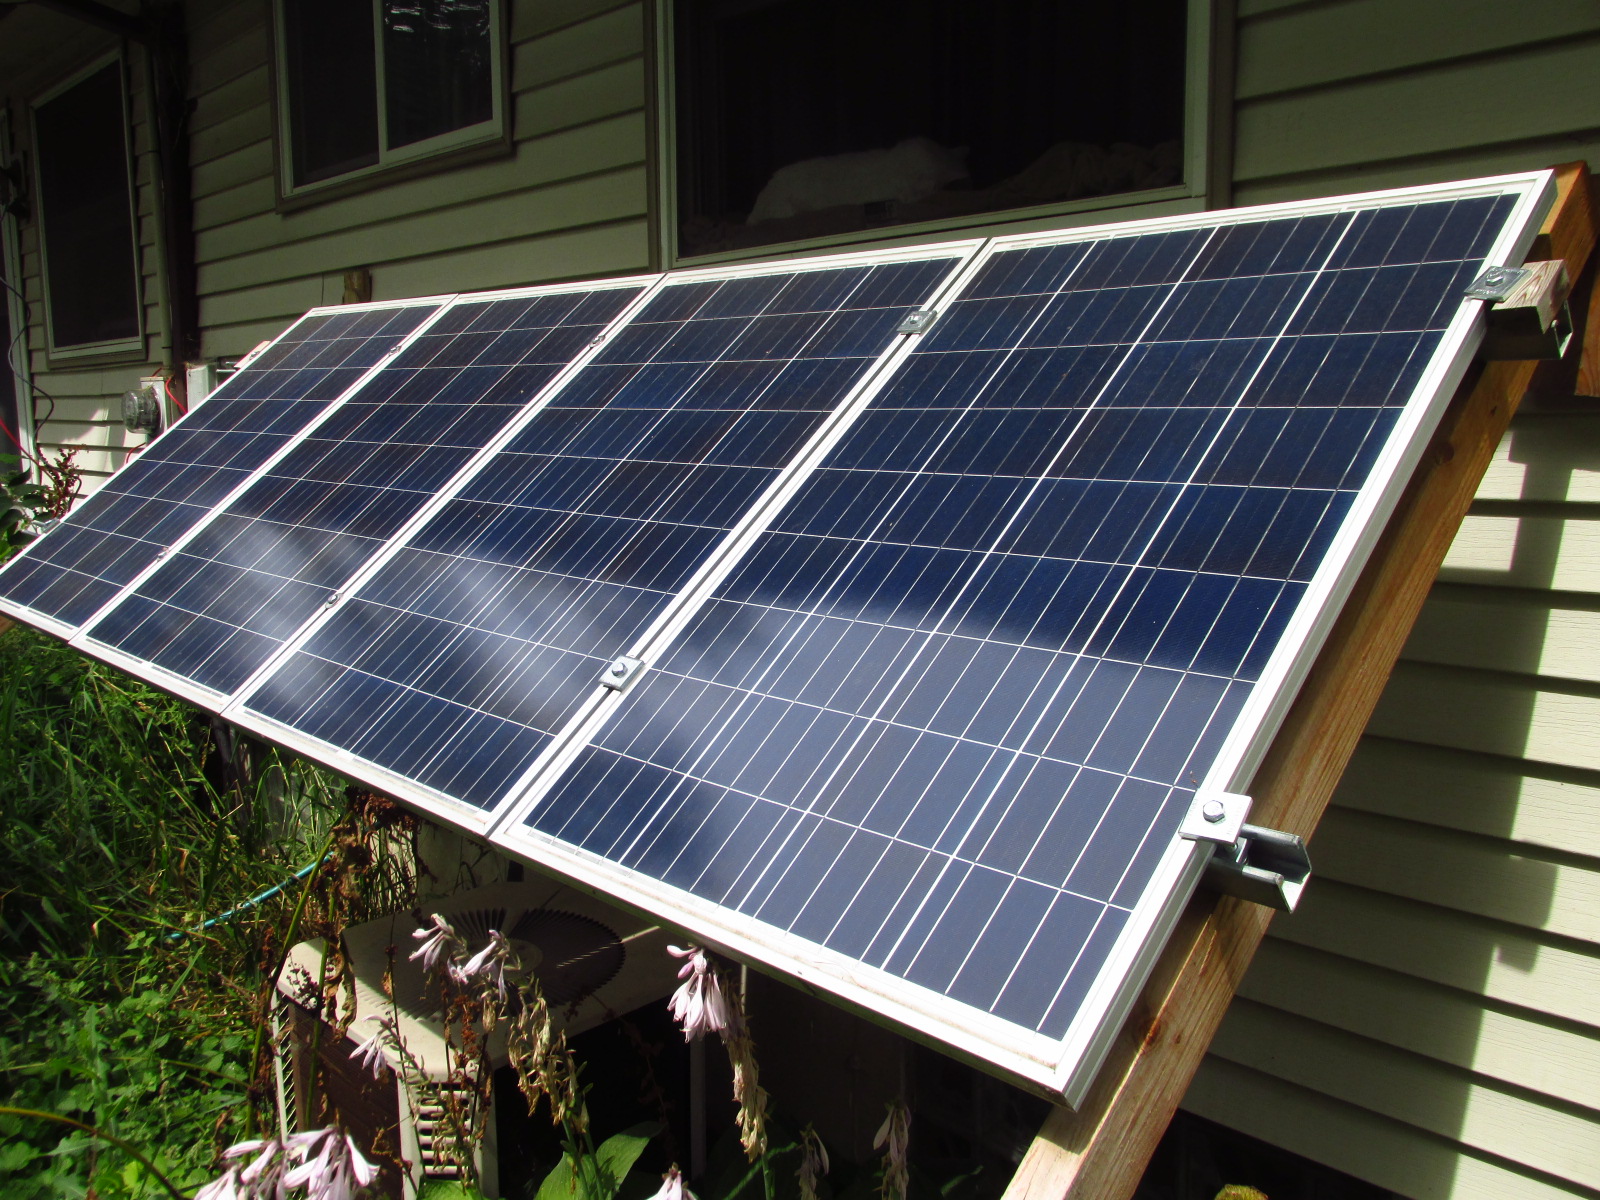
I'd been wanting to mount my solar charge controller and related stuff on a rack on the wall in my basement. Originally the plan was to make a 19″ rack and mount them all on that, but in addition to the already-mentioned things that make 19″ panels annoying, the space between the studs where I wanted to put it is only 15″ wide, and it was important to me that I make use of that space rather than have yet another thing sticking out from the wall.
I'd already made a few 12″ gridbeam-mountable square panels for holding power tools (a sander and a router), so it wasn't much of a stretch to declare "12-inch gridrack panels it is". So I made a rack using a pair of what I call "gridrail", which is gridbeam but made of one-by-twos, because it doesn't need the holes in the side-to-side direction. The rack fits between the studs. This convention is easily adjustable to any other multiple of gridbeam widths. For example 9″ could be useful in tighter spaces, and a 'double-width' 24″ rack could hold extra wide stuff (including adapters for 19″ equipment).
So far I've built 3 gridracks (the 12″ one for my solar charge controller and related equipment, and a couple of 9″ ones), not counting the implicit gridracks that pop into existence any time two pieces of gridbeam run parallel to each other. I expect to build more as attach-stuff-to-other-stuff situations continue to arise.
To summarize
Making stuff based on gridbeam is great because:
- It provides a framework within which you can build a lot of different stuff, and be confident that it can all be packed or bolted together relatively nicely.
- Dimensions are just multiples of your gridbeam unit cube, so easy to memorize and do mental arithmetic about.
- Rails and panels are super easy to make, even out of random bits of scrap wood.
- You can assemble/disassemble composite structures with only a few tools (a 5⁄32 allen wrench and a 7⁄16 crescent wrench cover most of the bolts I use) and store the parts efficiently.