I just want to say that these 'Gridbeam Panel Router Templates' (they're not exactly templates, so I'm not sure what to call them, but maybe 'jig' is a better word) work really well.
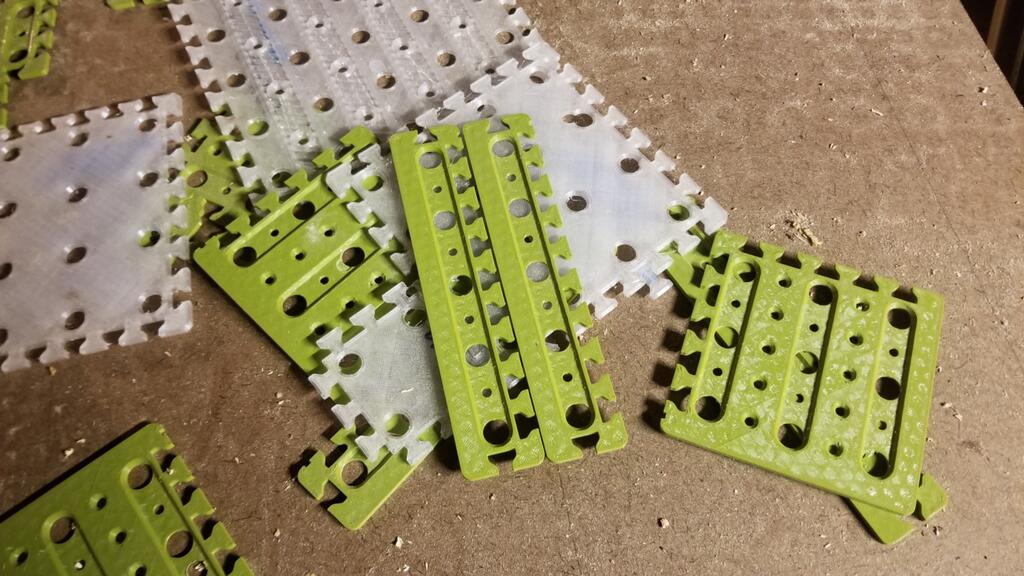
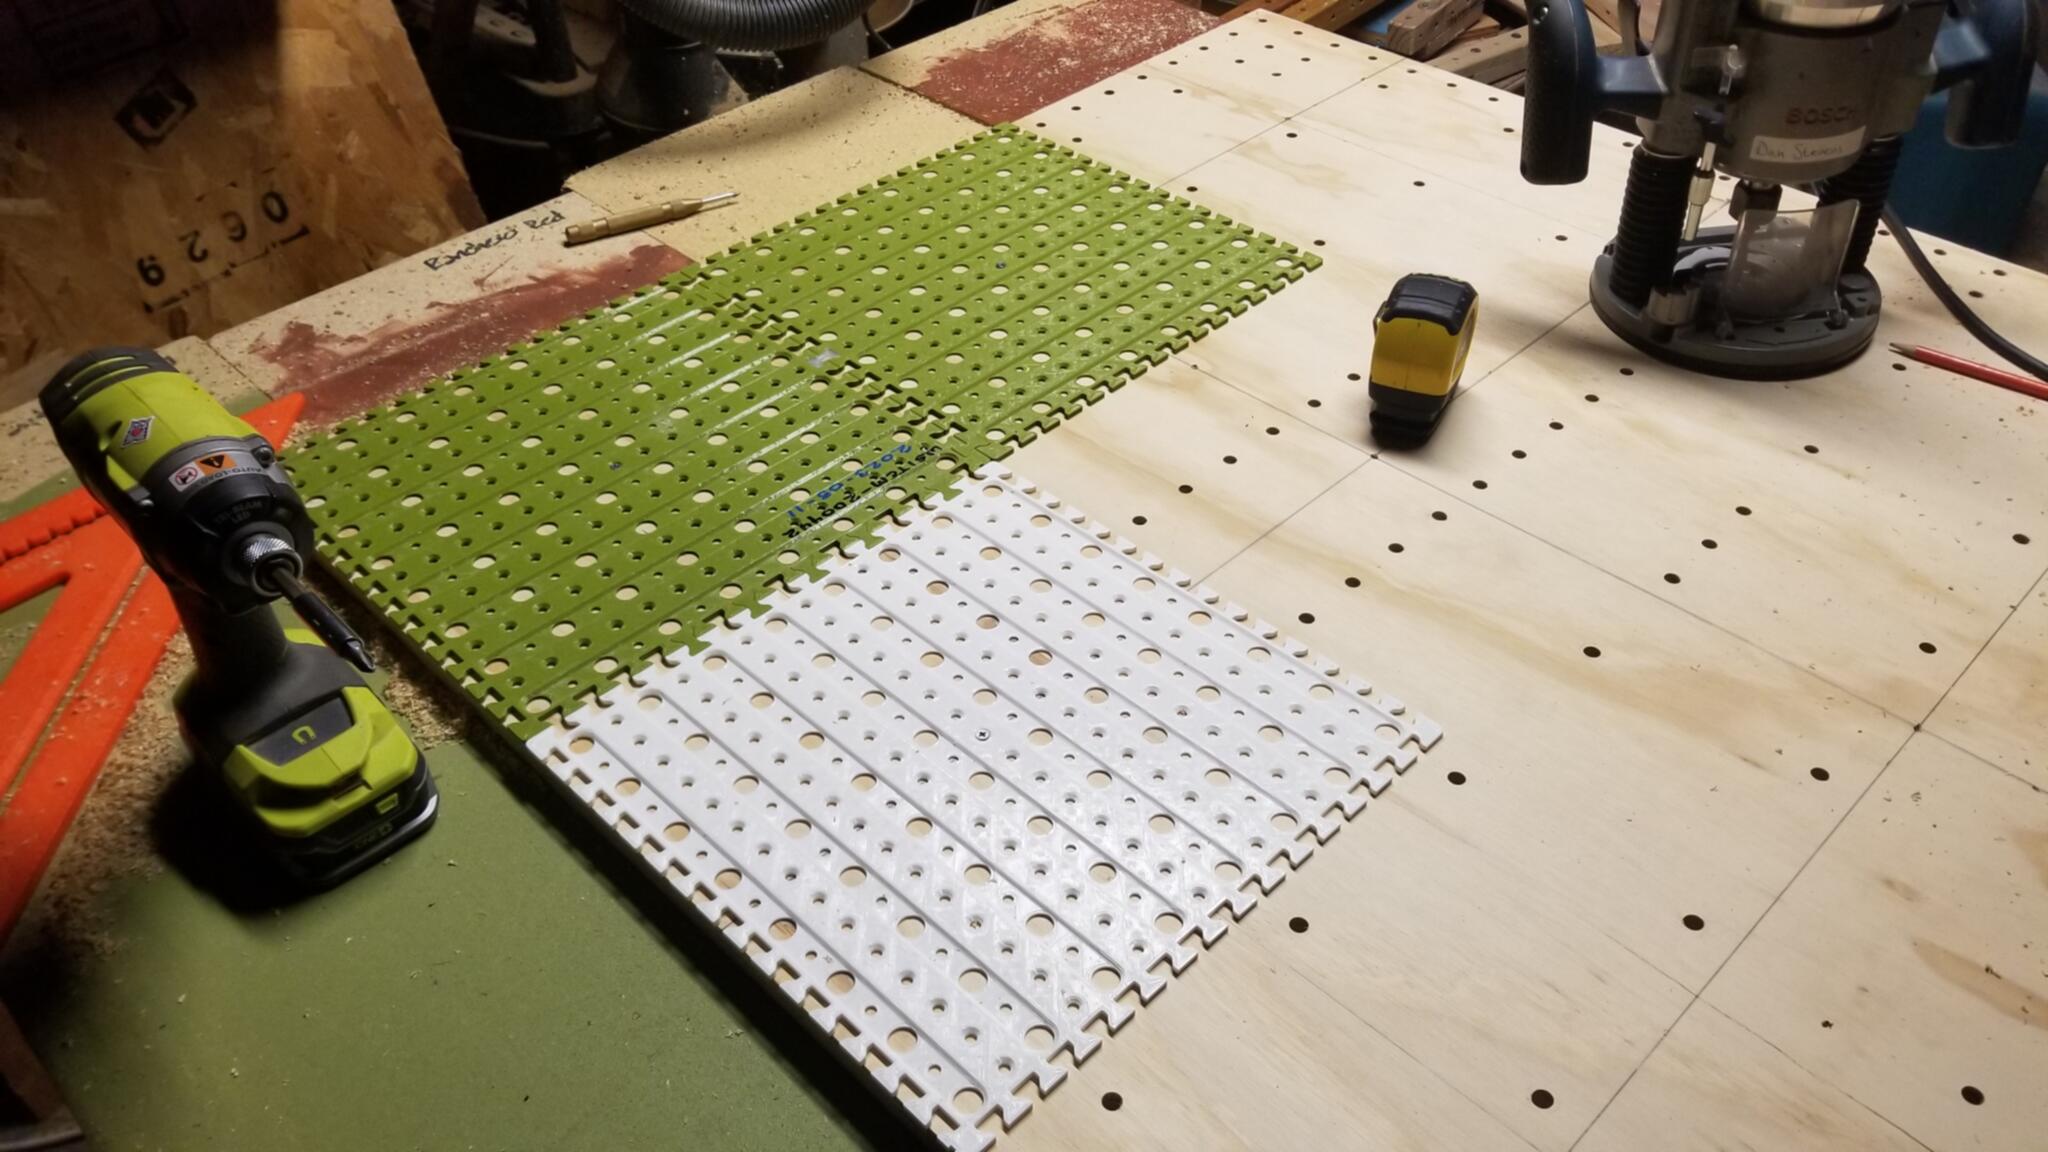

The large holes are 12mm in diameter, which is enough to fit some router bushings that I bought that have a 7⁄16″ outer diameter, which I use to make nice neat holes (using this bit in my Bosch plunge router).
The small holes are countersunk for #6 screws, and I use them to fasten the guide panels down to whatever piece of wood I'm working on. Alternatively it can be clamped down, but then I have to move clamps around, making the process a bit more tedious.
The funny little connectors and cutouts allow the panels to be joined together along the edges. The connector shape is a hermaphroditic ¾″×½″ bowtie (draw it on graph paper with each cell = ⅛″) with convex corners rounded for compatibility with hypothetical CNC-routed-using-a-¼″-bit counterparts.

OpenSCAD files: the jig, the bowties. (They reference some other libraries; to use them it's probably easiest to just clone the whole OpenSCADDesigns project.)
I also made a YouTube video showing these guide panels in action.
Perfectly self-explanatory, I hope!
Other Workshop News, With Pictures
To improve gridbeam production, back in March, I finally (after having thought about doing it for months) cut a chunk of MDF and fastened it to my table saw with some furniture bolts to mke a 'zero clearance' and MUCH LESS FLIMSY top for my crappy Harbor Freight table saw. The original plate that it came with was so bendy that it was impossible to cut stuff straight.
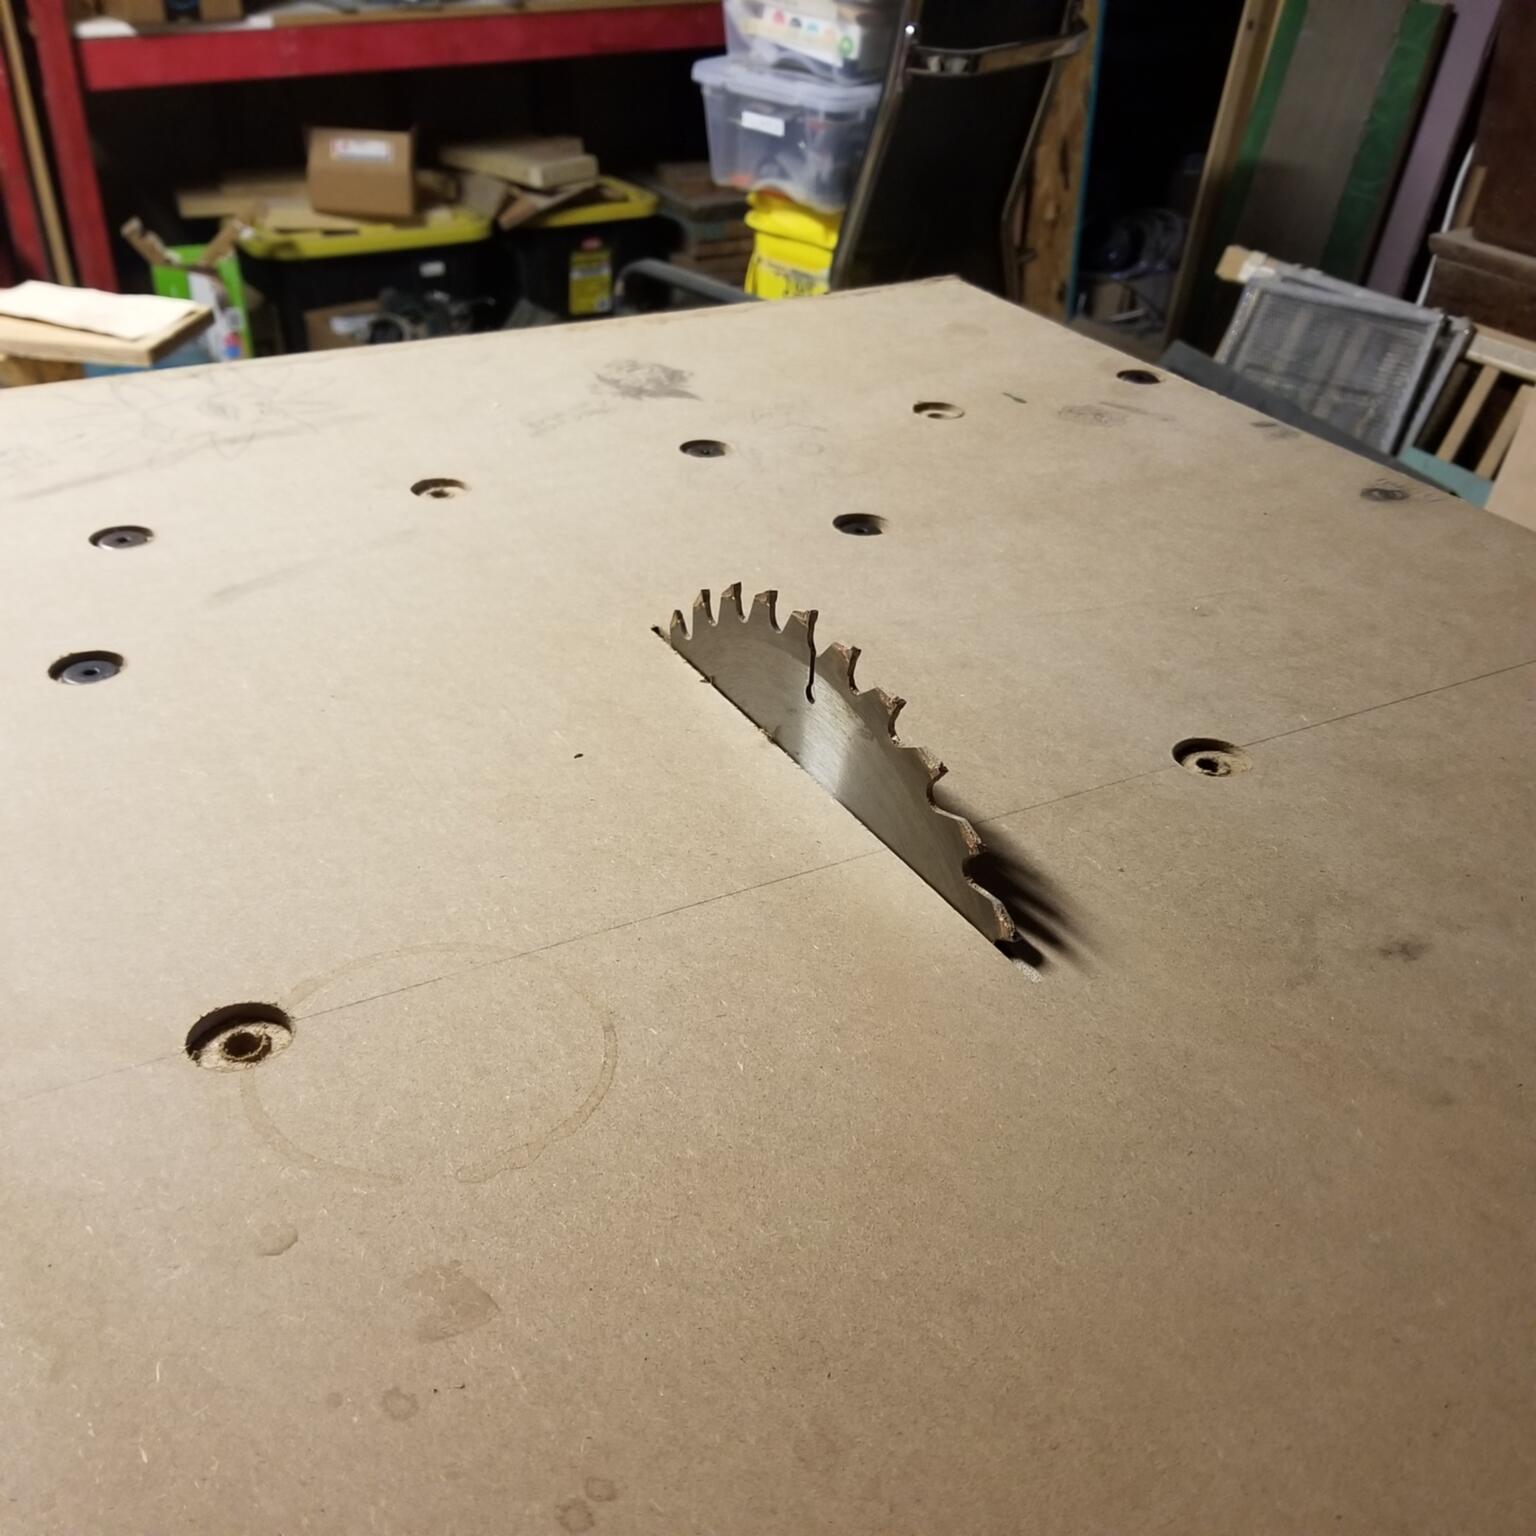
The new top has matchfit dovetail grooves across the top (not yet routed in the above picture) so that a fence can be bolted to it.
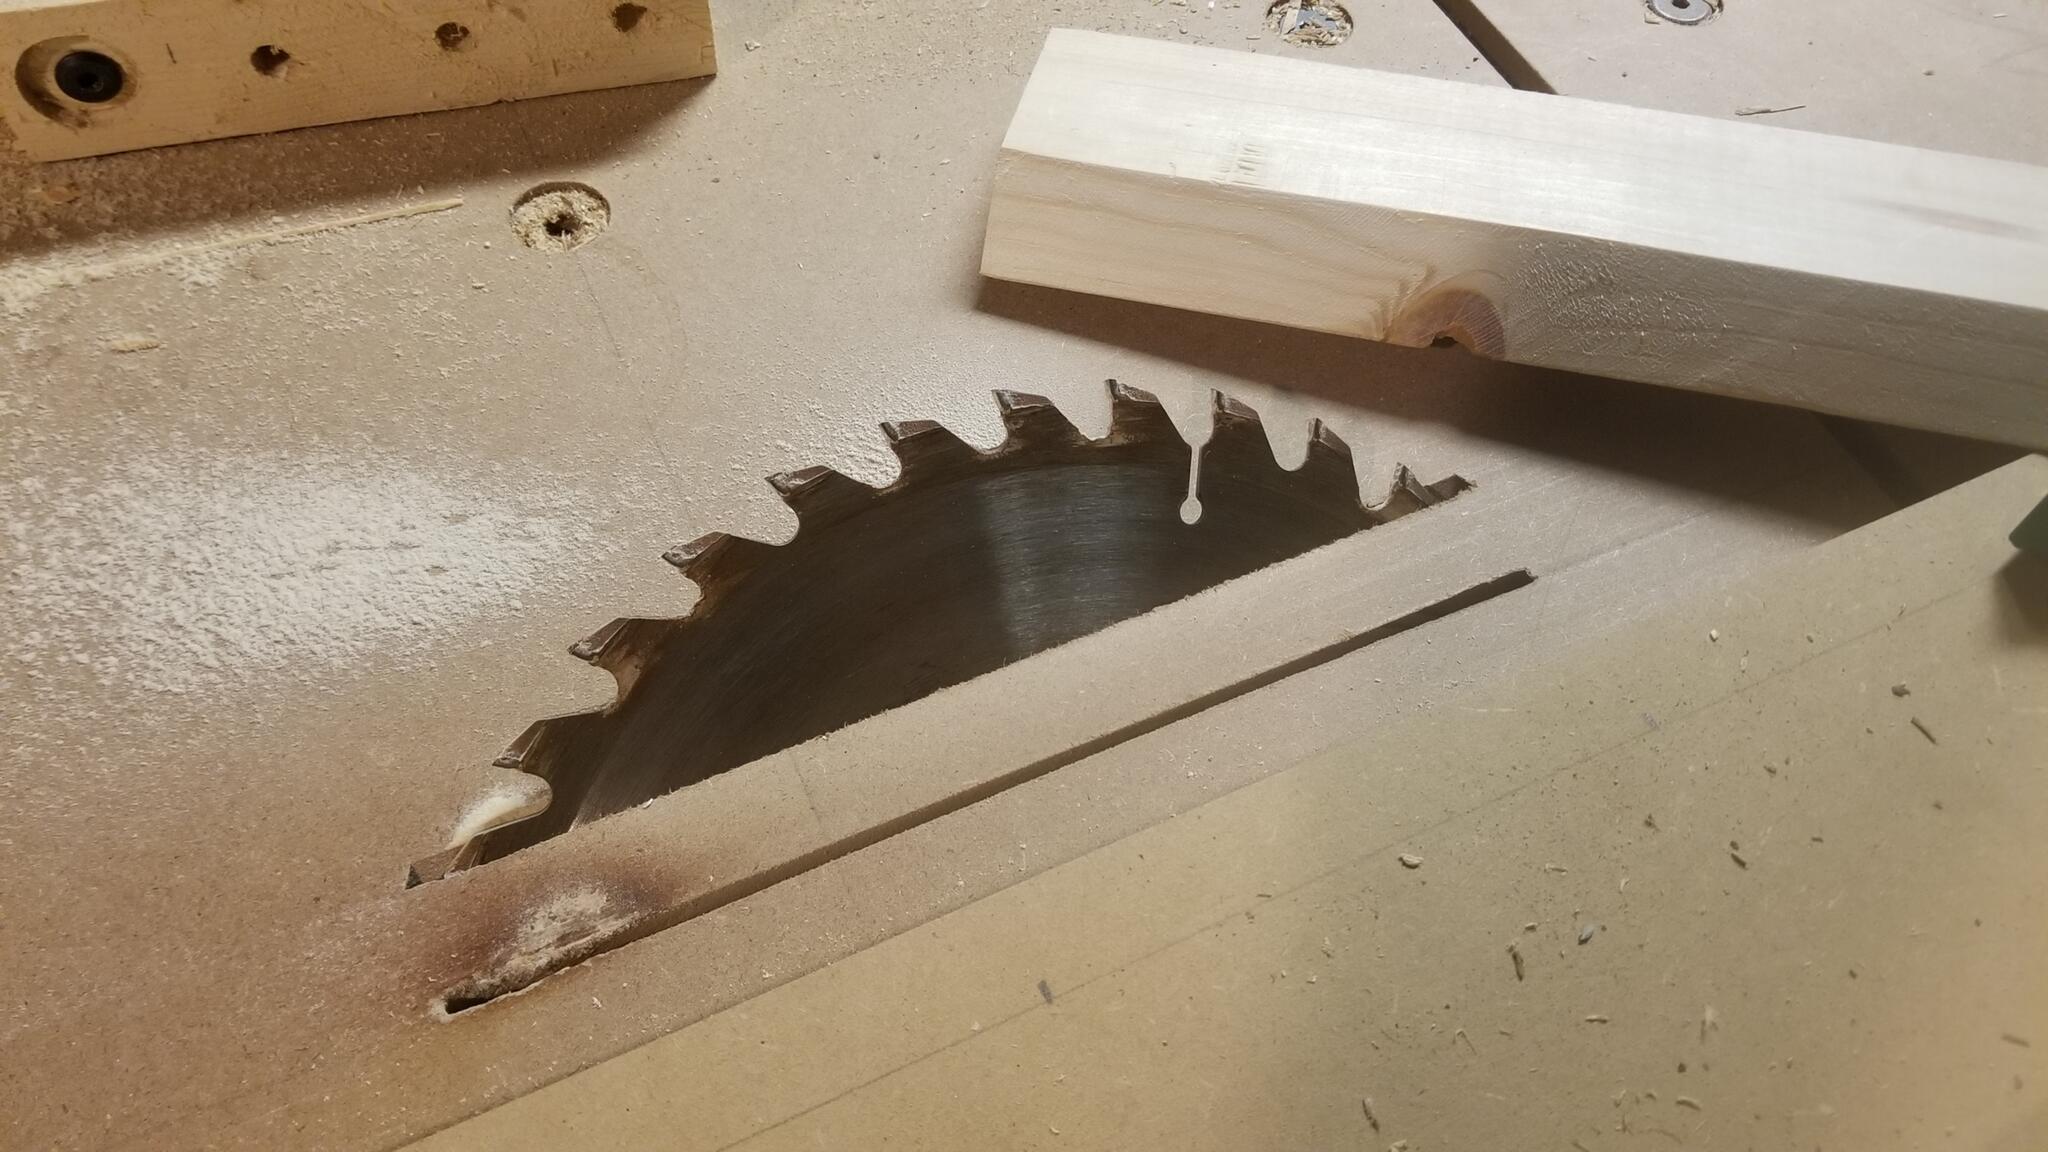
I eventually brought the blade up through it again, this time slanted 45°, for French cleat-ripping purposes.
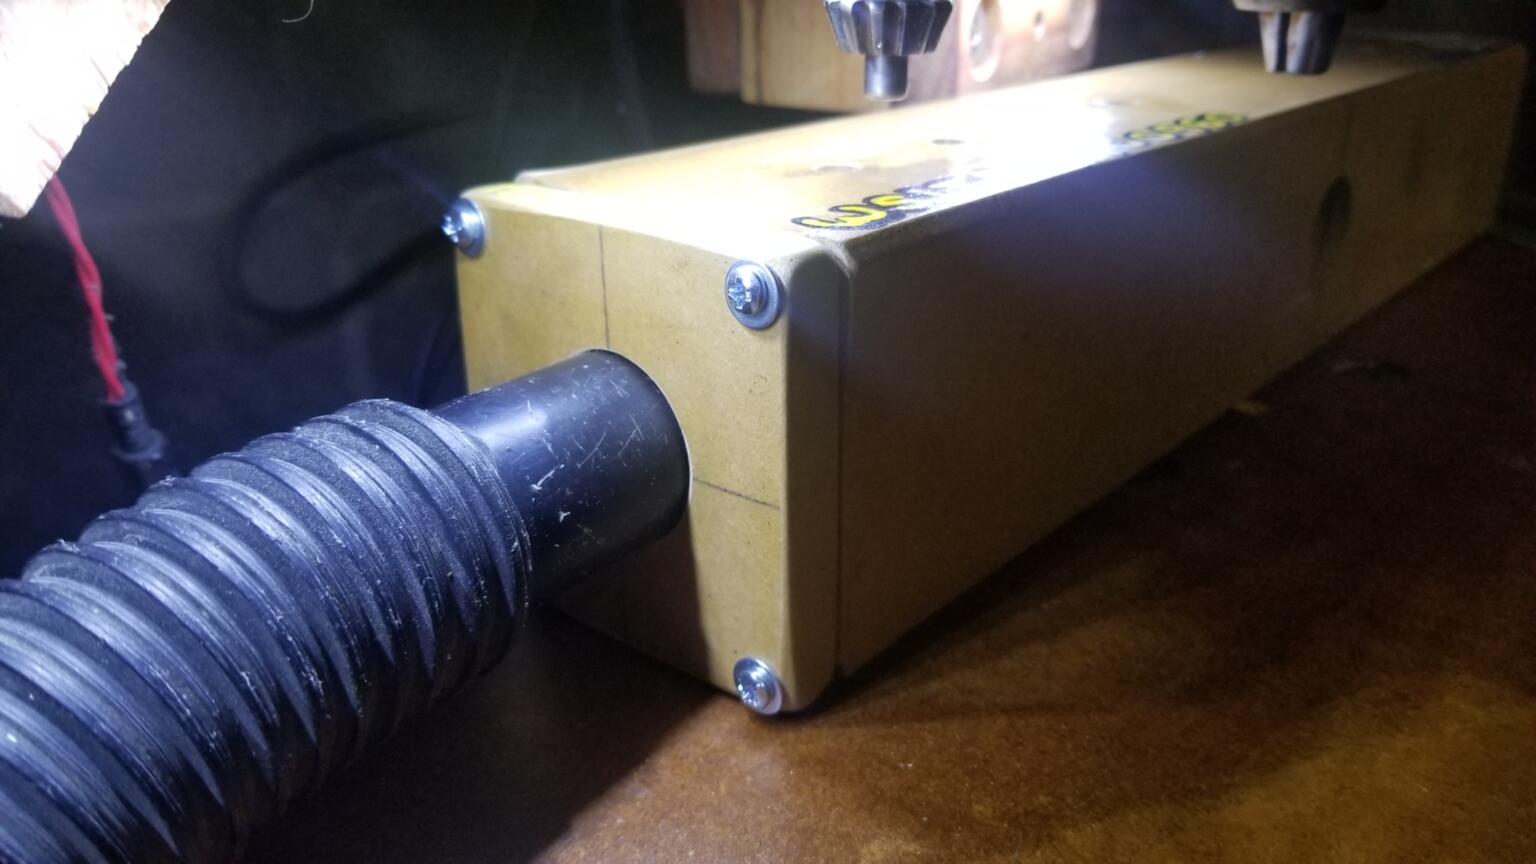
I bought a Cyclone. Actually I bought two of them; one for the Madison house, and one for up north. Now that I was less hesitant to use the shop-vac, I built a vacuum fence for the drill press to better suck up sawdust while I'm drilling gridbeam. Actually I built two of them, for the same reason as having two Cyclones.
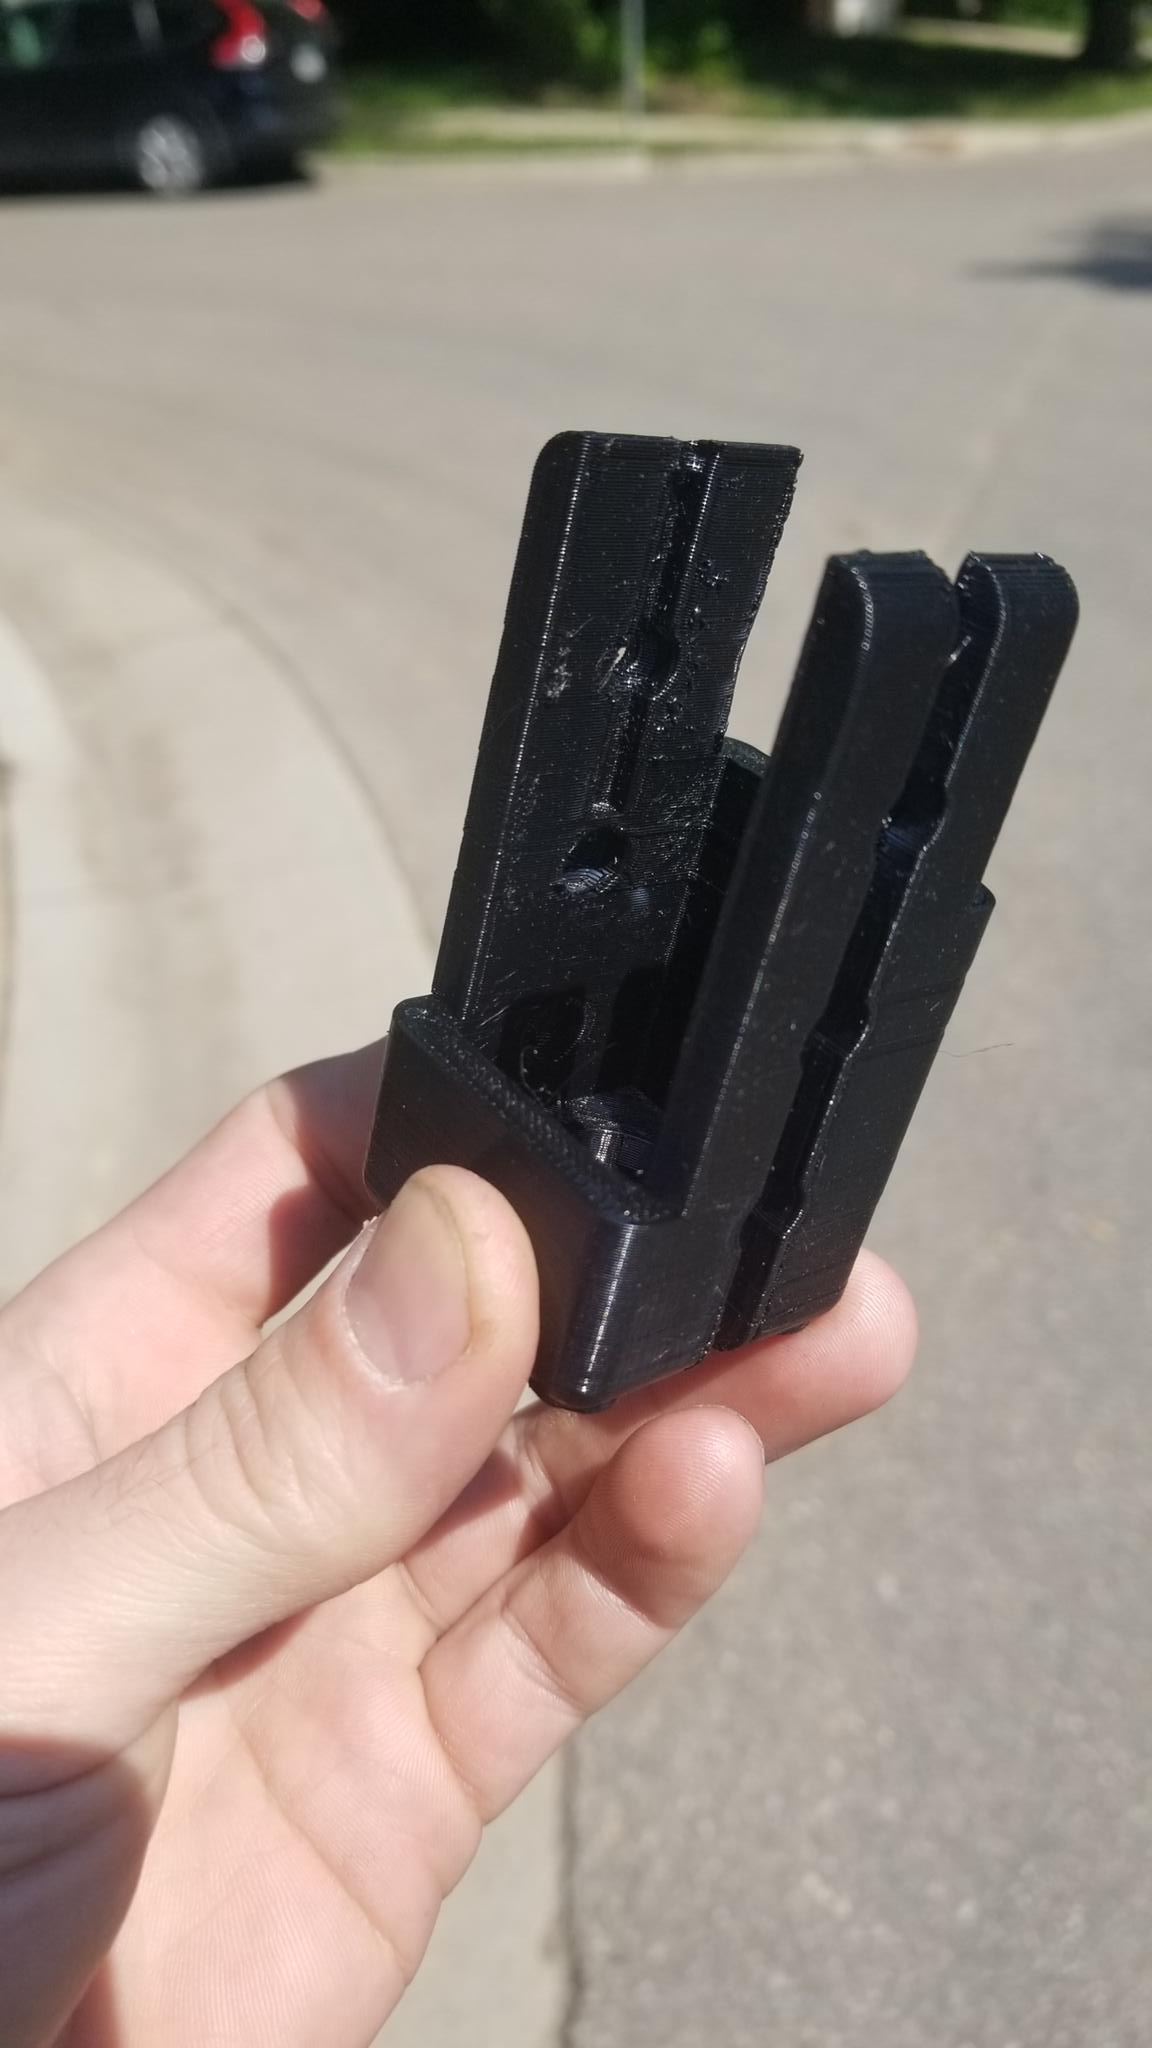
I designed and printed a mounting bracket for those extension cords with 3 plugs at the end and a flangey bit on each side.
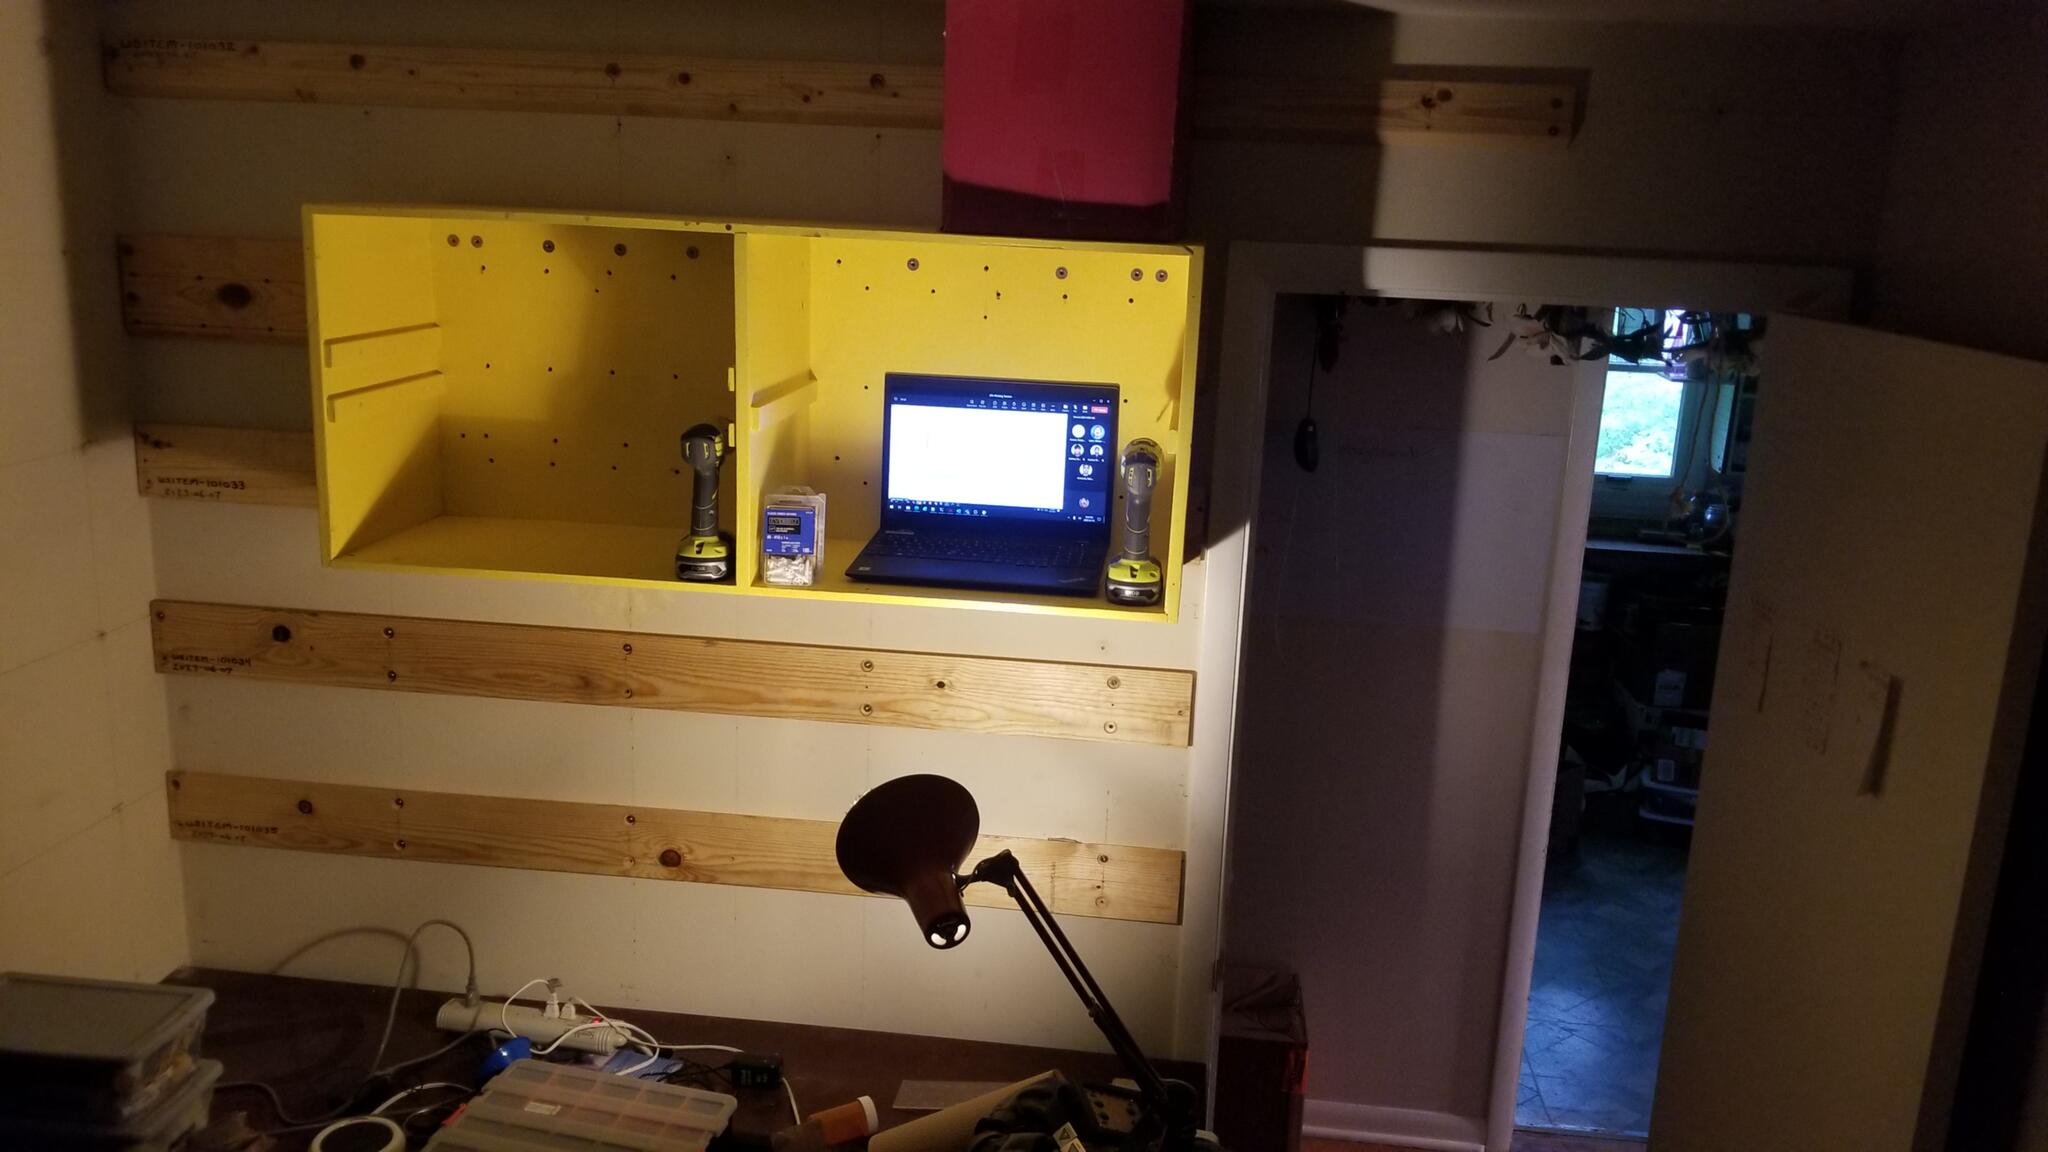
I finally got French cleats up on my office wall. I had put off finishing that project (WSPROJECT-200341) for months and months because I was overthinking the 'cut French cleats' process. Protip: Use the handheld circular saw with the fence attached to rip a bunch of WSTYPE-4114-4.5Ts).
I hope to write up about TOGridPile, soon. It's pretty much Gridfinity, but a little different. For one thing it's based on a 1½″ grid instead of a 42mm one.
