I needed a 4+1/2″×6″×1/4″ or so spacer in order to mount a 3D-prunt phone holder on a French cleat because the flathead bolts that I have are a little too long for the whole thing to work without a spacer (they would have poked out the back of the hanging French cleat and scraped the wall).
This seemed a good opportunity to try something I had wanted to try for a while: 3D-print a shell, then fill it with some kind of hardening goop.
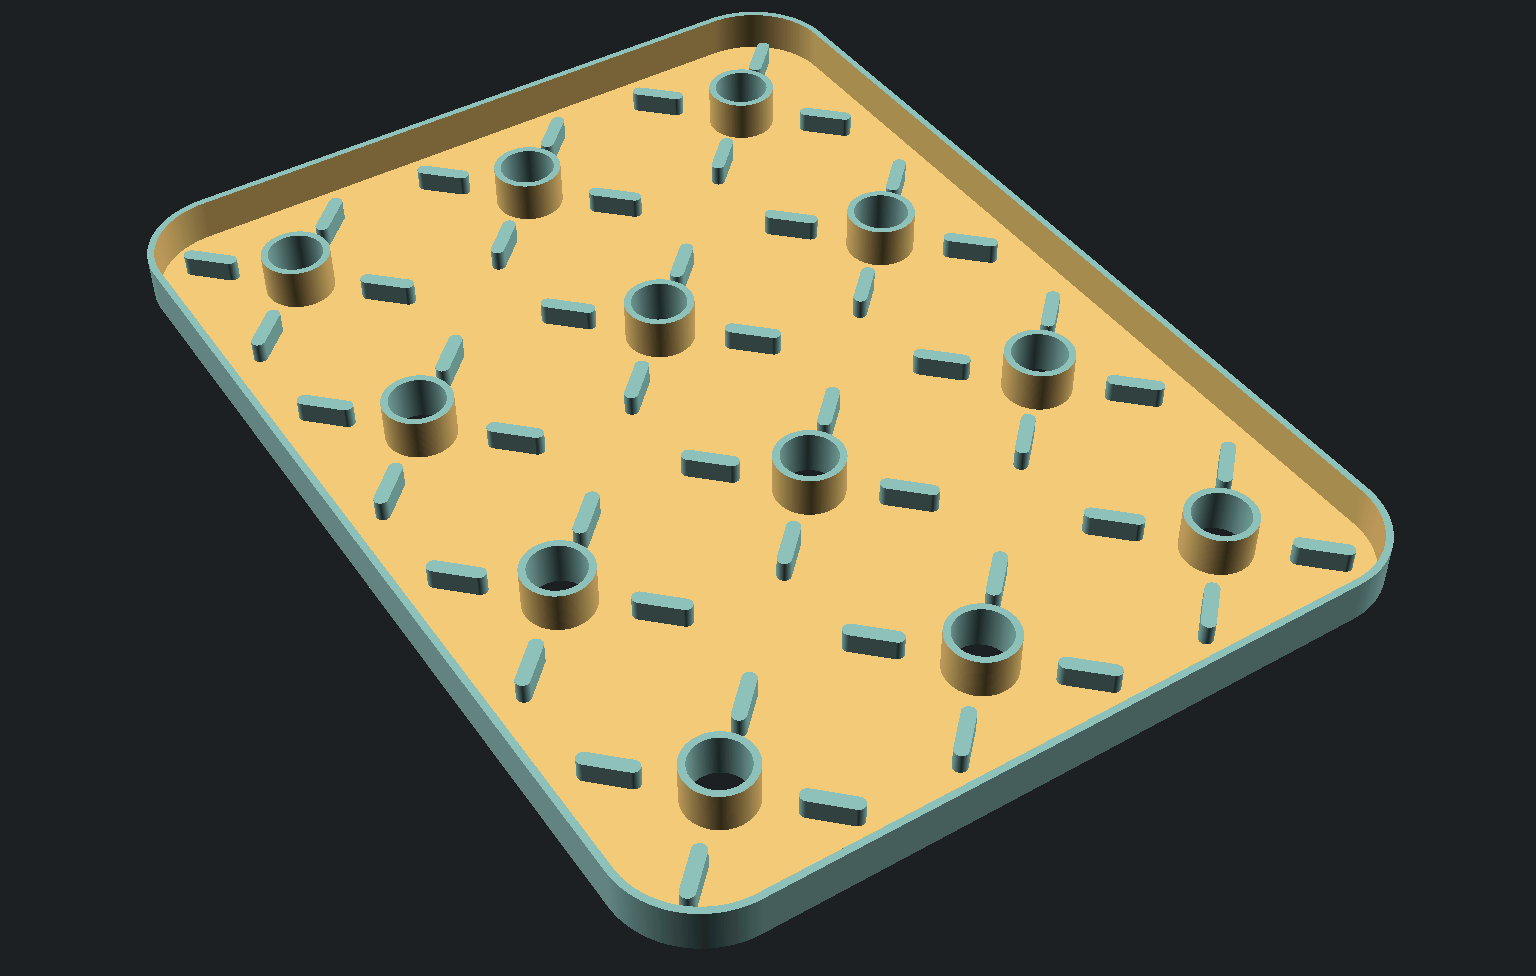
A good choice of goop would probably be epoxy or 2-part polyurethane resin. But I didn't feel like messing with those, so instead I used a mixture of sawdust and Durham's Rock-Hard Water Putty. And made three of them, while I was at it.
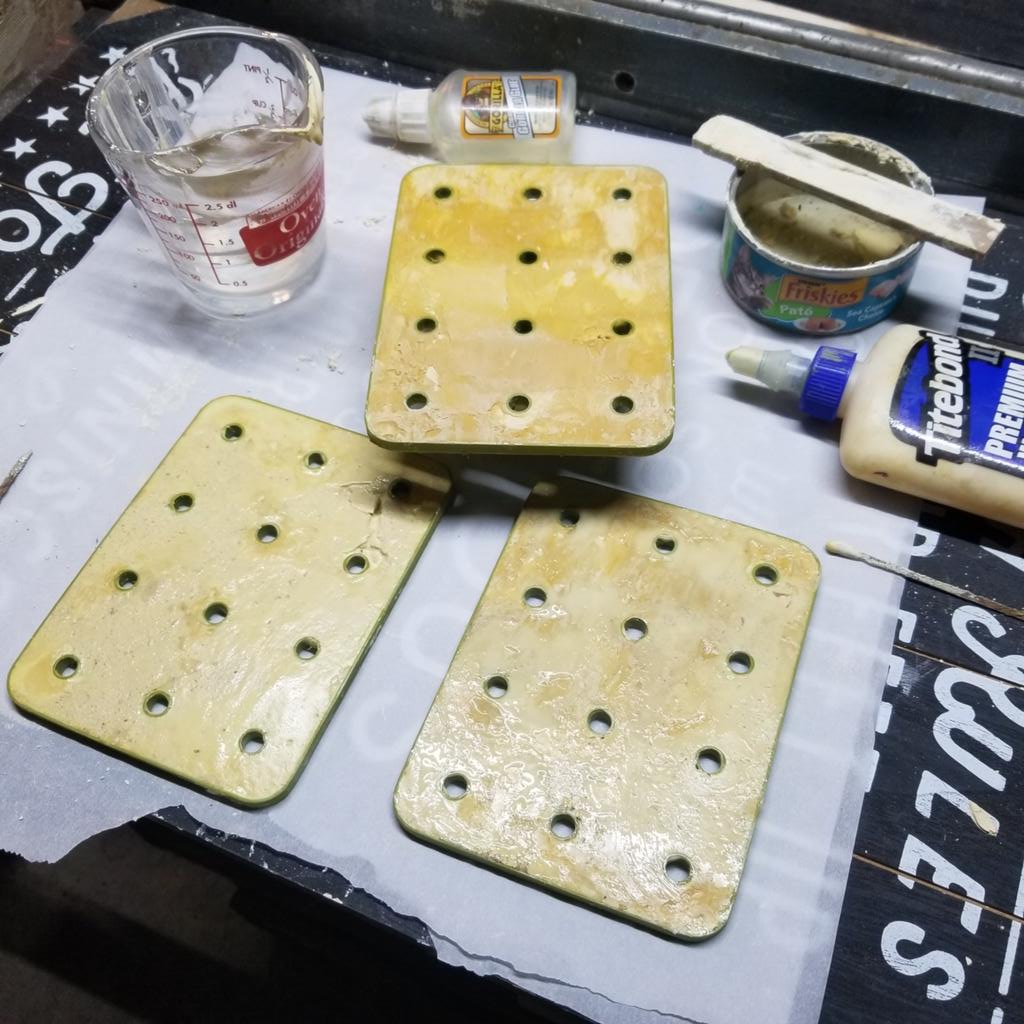
After the water putty cured, I sanded these down with a low grit sandpaper on an orbital sander so that the original PLA outline was visible, and chipped or drilled the water putty out of the holes.
Then I applied a coat of wood glue over the top, using my finger to spread it around, waited a few hours, sanded that, and applied another.
The next day I put them all in the oven at the lowest possible setting (170F) for an hour, mostly to speed up the curing of the glue.
Findings:
- 'Rock-hard' is no joke. This stuff is tough, and takes some time to sand down.
- These bowed upward as the water putty cured. I suppose it expands a wee bit, and my flimsy 2-layer PLA shells were not rigid enough to hold things perfectly straight. To compensate, I clamped them to a flat board, which seemed to straighten them out.
- Once cured for about a day, Durham's water putty actually sticks to PLA pretty well, and you may have to drill and sand bits that are stuck to surfaces where you didn't mean for it to be. To avoid that, peel it off of said surfaces after the stuff has become firm but before it has gotten hard, maybe within 2 hours of pouring it.
- Baking at 170F in the oven may have helped everything cure faster, but it also induced more warping, and seemed to leave the water putty in a relatively soft and more-easily-crumbled state. It becomes hard again when it cools.
For these quarter-inch panels, there was no practical reason to build them this way. Solid, or even infilled 3D-printed PLA would probably be just as strong, not to mention much less of a hassle.
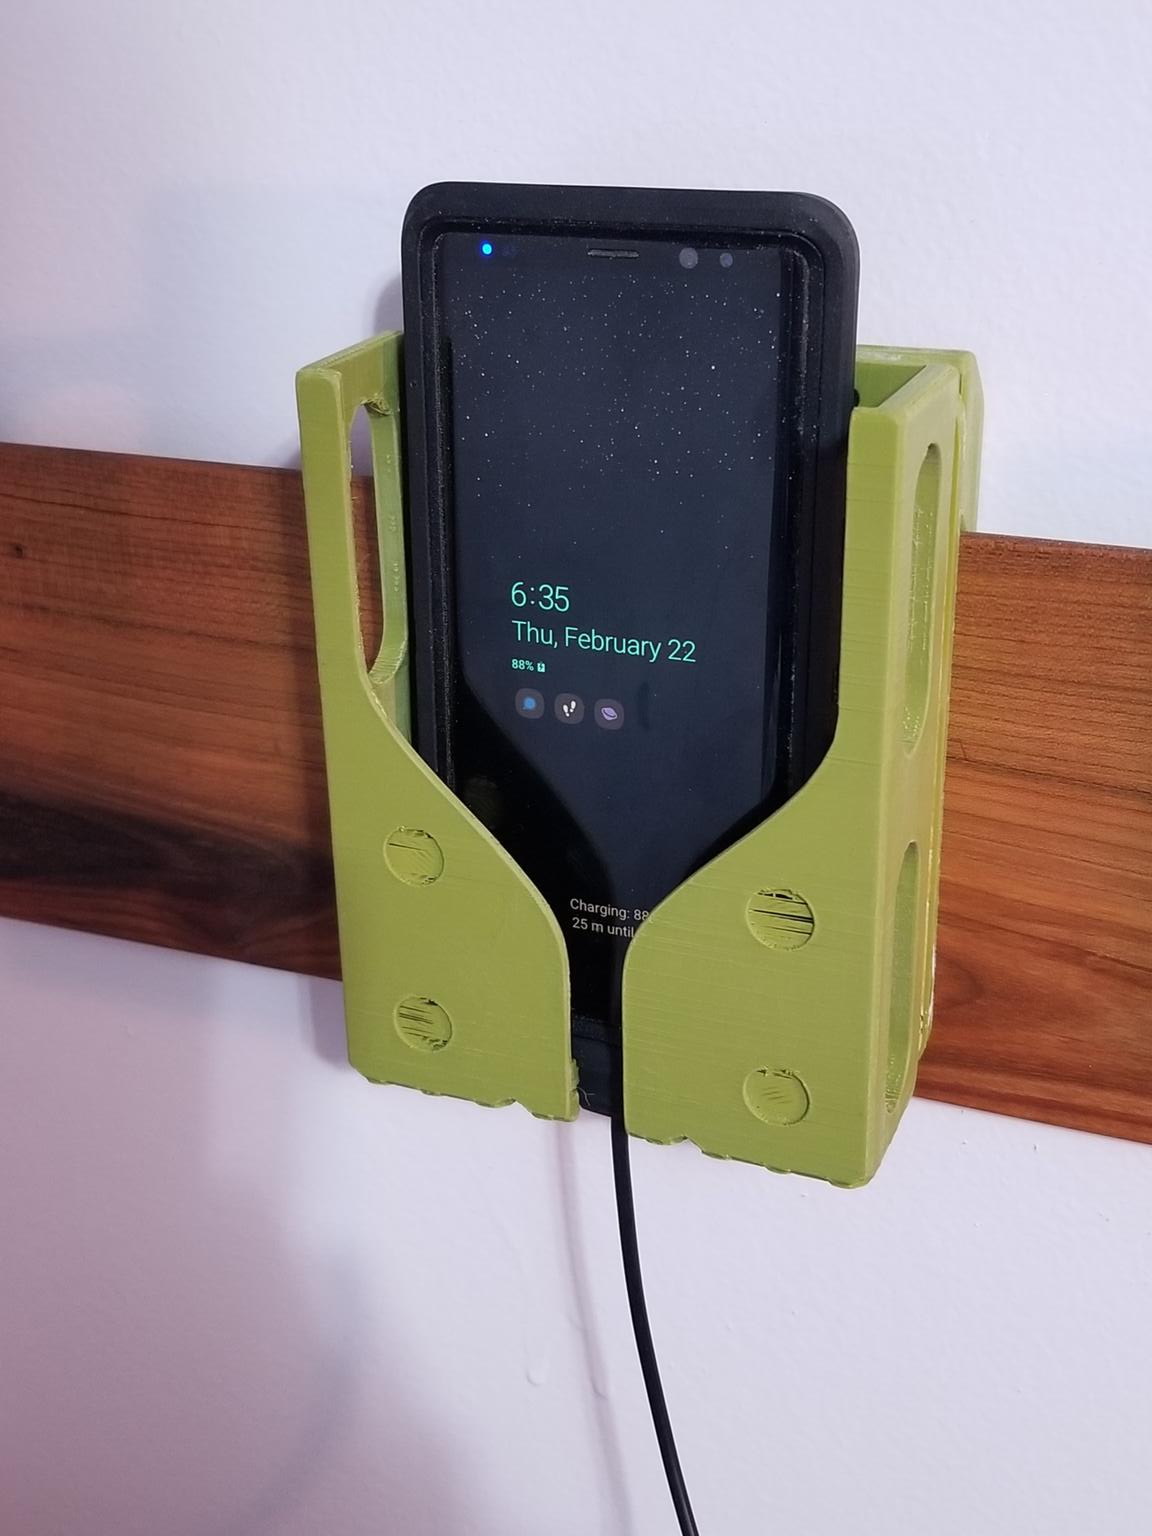
These panels are, however, unique, and it was kind of fun to make them. And the phone holder works just fine.
OpenSCAD designs: